In Part 1 of this blog, I have shown you the development of the
pattern of the handbag, which is downloadable in PDF format from the
A Pretty Talent website, free of charge. When we reached the end of the article, our pattern pieces were already cut out in fabric and waiting to be made.
Part 1 was published on 21 February 2015
Part 2 was published on 26 February 2015
Part 3 was published on 1 March 2015
Part 4 was published on 2 March 2015
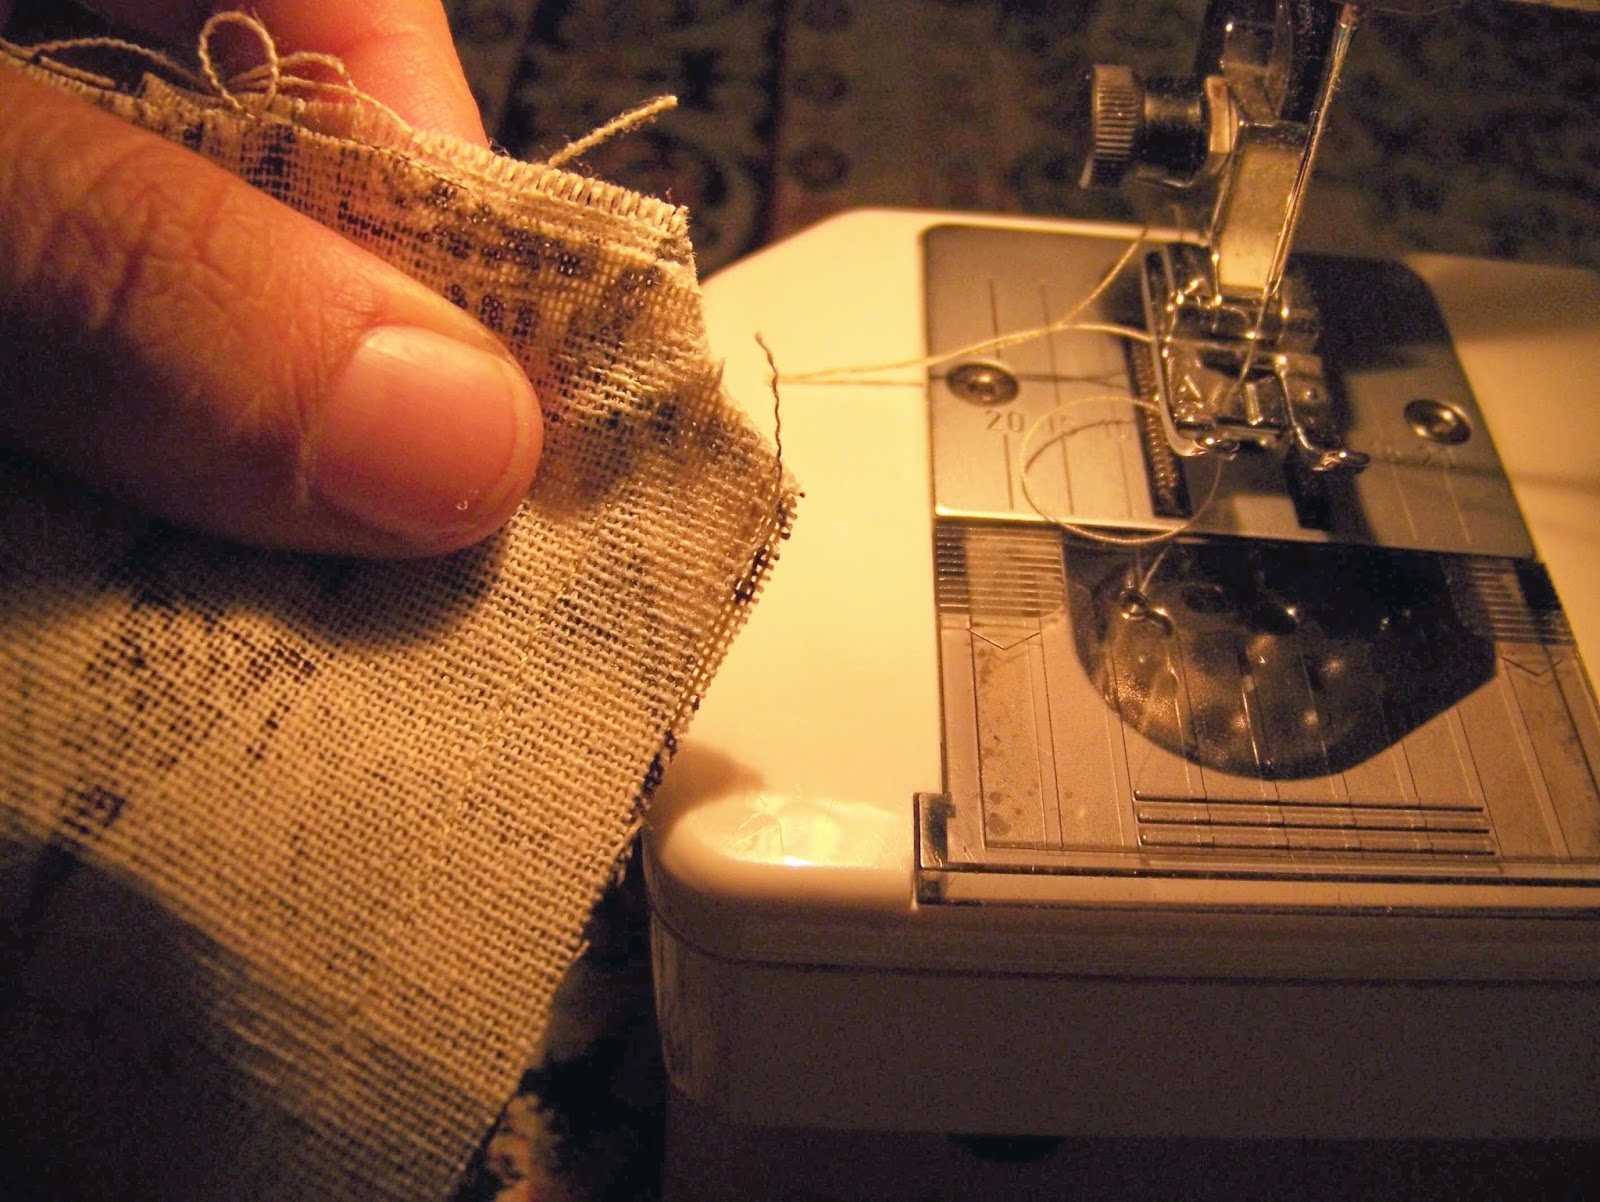
In today's blog I am going to show you how to sew the four inside pockets of the handbag. Let's start with the cellphone pocket.
Cellphone Pocket
You start by folding the pocket double in its length.
Measure approximately 1 cm in form the fold and pin the fold on both ends.
Now push the fold flat, so that you have a pleat and pin the pleat in place.
Fold the pocket in half with right sides facing each other. Pin the pocket together and fan it open.
Start approximately 4 cm away from the fold line and stitch all the way around the pocket. Stop approximately 1 cm before the fold line on the other side of the pocket. You want to leave the 4 cm gap open so that you can turn the pocket inside out. You need the gap on the other side to string the elastic through later.
Snip the corners opposite the fold line away, so that the excess fabric does not make bulges when you iron it flat. Be careful not to cut into your seam.
You can now turn the pocket inside out.
Sew a top stitch about 1 cm away from the fold line. This will make a funnel for you to string the elastic through.
Draw the elastic in so that the top of the pocket is about the same width as the bottom with the pleat. Pin your elastic in place. You can either tuck it into the funnel neatly, or you can tuck it at the bottom of the pocket.
You now need to iron the pocket flat before you continue. Be careful not to hurt yourself with those pins!
Pin the pocket to the centre of the handbag's lining.
Top stitch around the sides and bottom of the pocket, securing the elastic in place and fixing the pocket to the lining. Make sure you do not sew the pocket close at the top.
Now you can test it!
Tablet Pocket
It is time to put the cellphone pocket aside and move on to the tablet pocket.
The first thing you need to do, is find yourself a nice strong and wide piece of elastic, similar to the black elastic I found in my sewing box. Measure it to be just as wide as the pocket. Fold the pocket in half. Measure 4-5 cm from the fold line and pin your elastic in place. Unfold the pocket again.
Make sure your elastic stays in place, by sewing the sides only.
You now need to determine your own needs. What will go into this elastic? You are going to have to sew little 'compartments' into the elastic for your chosen items to fit. You might need a lot of narrower spaces, or more spaces that are wide. You decide according to your own lifestyle. Here is what I might typically want to carry with me. I leave room for my passion (art) room for being a woman (make-up), and room for being professional (pens, etc.).
Before I get to this step, I need to measure and mark the spaces I want to create. I used a pencil mark the lines where I wanted to sew. I then sewed the on the lines, forming the 'compartments' in the elastic.
The next step is to fold the pocket in half with the right sides facing each other.
Start approximately 4 cm from the foldline and sew the three open sides of the pocket closed. You can sew right up to the fold line on the other end, since we will not be stringing an elastic through this pocket.
Snip the corners to get rid of excess fabric and turn the pocket inside out.
It is important to iron the pocket flat before moving on to the next step.
Measure about a foot width from the top of the pocket (the fold line) and top stitch along the whole length of the top. This will help maintain the shape of your pocket, preventing the top from collapsing into the bottom.
Position your pocket in the centre of the remaining handbag lining and pin it in place.
Sew along the sides and the bottom of the bag with a top stitch, securing the pocket to the lining. Take care not to sew the top shut.
Time to put it to the test again!
The Side Pockets (for glasses)
There are two more pockets that can either go inside, or outside the bag, depending on your own preference. These are designed with glasses in mind, but will fit a myriad of other things equally well. We will not be able to complete the pockets, since they go into the seams of the bag itself, but we will get a head start on them.
Fold the pockets over, right sides facing each other and pin them in place.
Sew only the top seam.
Iron the top seams open, before turning the pockets inside out.
Now iron the pockets flat.
Sew a neat not stitch about a foot width away from the fold line.
We will have to wait for the body of the bag to be put together, before we can continue. The next steps will follow shortly in Part 3.