

Hardboard is a compressed wood board where pieces of wood, saw dust etc. are compressed into boards and bonded with glue. This makes it a very tricky surface to paint on. It is too porous to start with a layer of gesso, meaning that it will absorb too much of the gesso. Best is to treat it with a good quality undercoat.

I apply the undercoat with a synthetic hardy flat brush. If need be, I will apply a second coat as well, although the one in the picture is so good that I have never needed a second coat of this specific brand. The undercoat will need to be left overnight to dry thoroughly.

Wash the brush in turpentine or thinners when finished.

Making sure that the undercoat has dried, I started with the preparations of the background. It had to match my mom's living room and I opted to use acrylic Rose Madder and Portrait Pink. I would apply this with the same synthetic flat brush. The reason I chose this brush is because it would leave a striped effect in the paint and did not want a smooth finish. Sometimes all you need is a cheap paint brush to get the effect you want.

I squirted the paint all over the board and then dragged the paint brush through the paint, working rhythmically from side to side.

I took care not to mix the colours too much. I wanted each colour to retain its own integrity as well as to get tones and values where the two did mix.

I used a paper towel to clean up the edges where the paint had dripped onto the edging. If you don't wait too long this will simply wipe off. If it has already started drying, use an old damp cloth and wipe it clean.

Time to consult with the client, in this case my mom. I asked if she had anything specific in mind for the picture to go on the board. She did and showed me this picture she found somewhere. Sorry, I don't know who to give credit here. She started telling me what she wanted to keep and what needed to be left out. I know my mom and the way she was talking gave me the idea she might be interested in doing it herself. I offered her the opportunity. She politely declined, saying she knew I was recording everything for the sake of the blog. I assured her that it would not be a problem. I would simply lean over her from time to time to snap a photo. She did not wait for a second invitation, but jumped right in.

My mom started by taking careful measurements for the Ndebele frame which she loved. She drew this in pencil, making extensive use of the rulers.

My mom drew the birds using a paint marker. This fibre tip pen is literally filled with paint and combines wonderfully with other paints in a project. It 'takes' on both acrylic and oils.

It was my mom's first time using the paint markers and she was as impressed with them as I was, so she continued to use them even after the outline was already in place. Typical concerned mom she checked with me first to make sure that it would not negatively impact my stock, but I assured her that it was meant to be used, not merely admired and there was enough left for my customers as well.

Eventually she did put the pens aside and dove into the paints and brushes. The next few photos show her progress, but I can't tell you much more about it, so I will leave the pictures to speak for themselves.


She declared the painting finished when she reached this spot, saying it would be nonsensical to add any more detail, since it was going to be covered with keys and hidden behind a door anyway. Wise mom.

Mom then cleaned everything and packed it away, satisfied with her part of the project. That left the hard-work part of the project up to me. But she knows I do not mind this, the way mothers and daughters often do. I went to their current key holder to check the length of the longest set of keys. If the key holder could accommodate this set, it would work for all the others as well.

I marked the spaces for the key hooks off very carefully, taking accurate measurements all the time.

With the spots marked off where the hooks needed to go, I made tiny little holes in those spots. This will make it easier to screw the hooks in later. Simply position a nail on the marked spot and tap the back of the nail with a hammer. You should still be able to remove the nail by hand afterwards. It is literally only starting the hole that hook will screw into. I have to admit that the men in my life find this step very humorous and unnecessary, but I don't have their physical strength when it comes to screwing the hooks in and I find this step very useful.

This is what the board looked like after the holes for the hooks were made. I still needed to buy the hooks and so I left it at that to concentrate on inserting the hooks for hanging the board on the wall. I already had these.

I marked the space where the hooks for hanging the board needed to go. A good rule of thumb is to put the hooks in 1/4 of the length from each side.

I once again gave myself a starting hole, using a hammer and nail.

I screwed the closed hooks in place. The hooks for the keys would have to be open hooks, but I do not want the chain to come off the board, so these hooks have to be closed. If you find the hooks are to tough to screw in by hand, use a pair of flat-nosed pliers. That should do the trick.

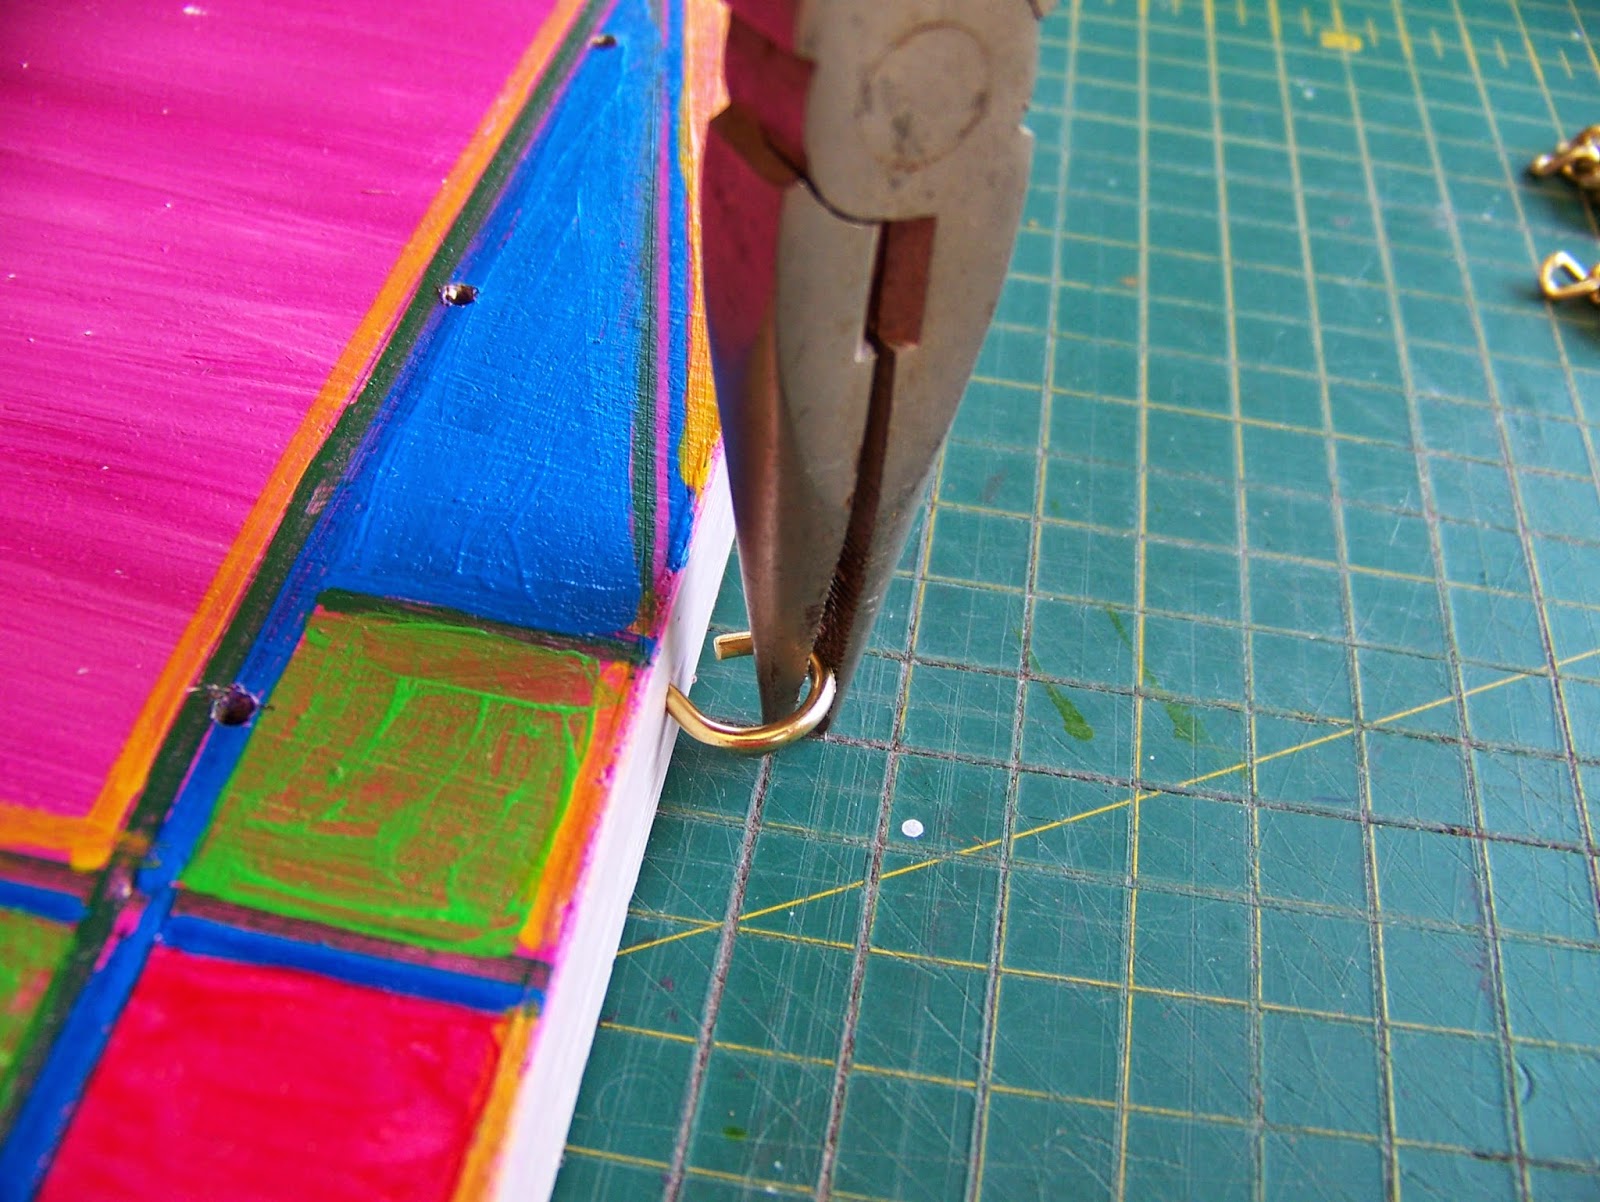
I use a pair of sharp-nosed pliers to bend the screws open and then I slip a chain into the hook, before I use the same pliers to bend the screws shut again. You can ask your local hardware store (where you buy the chain) to cut the chain to the specified length. I usually by a couple of metres and 'cut' it myself. Really I find that it requires too much strength to cut it and prefer to put a chisel on the chain. I then whack the chisel on the back with a hammer and the chain seems exceedingly happy to give way under this treatment.


I hung the board on a conveniently located hook to give you an idea of what it will look like on the wall.

I once again gave myself a starting hole, using a hammer and nail.
I screwed the closed hooks in place. The hooks for the keys would have to be open hooks, but I do not want the chain to come off the board, so these hooks have to be closed. If you find the hooks are to tough to screw in by hand, use a pair of flat-nosed pliers. That should do the trick.
I use a pair of sharp-nosed pliers to bend the screws open and then I slip a chain into the hook, before I use the same pliers to bend the screws shut again. You can ask your local hardware store (where you buy the chain) to cut the chain to the specified length. I usually by a couple of metres and 'cut' it myself. Really I find that it requires too much strength to cut it and prefer to put a chisel on the chain. I then whack the chisel on the back with a hammer and the chain seems exceedingly happy to give way under this treatment.
I hung the board on a conveniently located hook to give you an idea of what it will look like on the wall.
Once I had bought the hooks, it was time to screw them into place. There are quite a few that needed to go in and after a while, I gave in and used the flat-nosed pliers to screw them in. This spared my hands a lot of agony.


I was very happy with how the key-holder turned out, but more importantly, so was my mom. She now had space for 33 keys!

I was very happy with how the key-holder turned out, but more importantly, so was my mom. She now had space for 33 keys!
For more crafty ideas and great products, visit APrettyTalent.com.
Remember to keep nurturing your TALENT for making PRETTY things.
You can subscribe to this blog and receive regular updates by email by simply registering your email address at the top of the current blog.
You can subscribe to this blog and receive regular updates by email by simply registering your email address at the top of the current blog.
No comments:
Post a Comment