Preparing the surface and background
I start by preparing the coasters I am going to use by painting them gesso so that they will more freely receive paint and the paint will adhere to the surface. I use an old flat brush throughout this project. All of the mediums are water-washable and it is easy to carry on working with the same brush once I have rinsed it in water.
I am going to paint the coasters in sets of threes, each set a different coordinating color. I use acrylic paint in the project. The colors I settle on are Buff Titanium, Raw Sienna and Burnt Sienna.
I decide to paint the edges in Raw Umber, which is a tad darker than the colors I used to paint the coasters in. This is the only time I use a different brush choosing to use a smaller flat brush.
I now step away from the project needing the paint to dry completely before I continue. In reality, I carried on with other aspects of the project, but it would not make sense for me to write this blog in chronological order. I will rather finish each part to make it more cohesive for you, the reader.
Image transfer onto wood
Once the paint is dry, I select the images I want to transfer to the wood. The background of the paint will affect the appearance of the image, so choose your colors wisely.
In a case such as this, I do not try to be economic with the paper, but rather to make sure that I get the best image for the intended project.
Cut the image exactly to size. You may work with cut-outs, or cover the whole surface, as I am doing. I used the coasters as stencils and cut around it with a craft knife.
VERY IMPORTANT! An image printed on an inkjet printer will not work. Inkjet printers make use of ink. You need to use an image that was printed with toner, such as is used by laser printers and photocopiers. You also need to use ordinary printer type paper. Do not use photos printed on glossy photo paper, for instance.
Layer Modge Podge thickly on the painted surface of the coaster.
Lay the image face down on the Modge Podge.
Use a roller to work any air bubbles out to the side.
Once the images are stuck down, lay them aside to dry completely. I gave it approximately an hour, but drying times will differ due to humidity and temperatures.
Once the Modge Podge is completely dry, wet the paper/coaster with a dripping wet paper towel.
Allow it to soak for a few minutes.
Once the paper is soaked, you can rub it off with your finger or a sponge. The image will stay on the wood (remember this will be a mirror image of the original image).
Here are the three coasters I originally intended to use. However I did not like the one on the right for my project and changed it with another.
Here is the alternative image I settled on. Let the coasters dry. This should only take a few minutes.
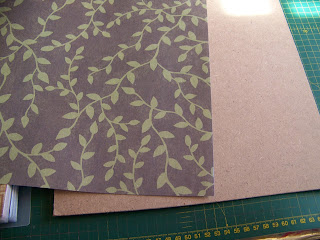
My intention was to mount the nine coasters on a backdrop. I now need to create this. I have measured the coasters and they will easily fit onto a 12" x 12" square. I love this, because I want to use one of my patterned papers for a backdrop. I mark a piece of masonite board to measure 12" x 12".
Saw the masonite on the marked line.
Smooth the rough edges with a file.
I love the green that this paper will add to the project, because it will break the monotony of the earth colors I am working in.
Lather Acrylic Gel Medium onto the surface of the masonite, covering the whole surface of the board.
Lay the paper in place on the board and roll out any trapped air bubbles.
Lather another thick coat of Acrylic Gel Medium on top of the paper.
In tomorrow's blog, we will do some distressing, inking, stamping etc, before we wrap things up.
LOVE IS A CHOICE OF THE HEART is available from Miekie Crafts on APrettyTalent.com.
For more crafty ideas and great products, visit APrettyTalent.com.
Remember to keep nurturing your TALENT for making PRETTY things.
You can subscribe to this blog and receive regular updates by email by simply registering your email address at the top of the current blog.


No comments:
Post a Comment