
The photos for this project are very sweet and capture the little boy's first seaside holiday. The photographer has managed to capture the dad's delight in sharing this special introduction with his son brilliantly. As is often the case with these photos, there are some problems. The photographers shadow has crept into the main photo. On the other page we have a succession of photos capturing the little baby's first introduction with the ocean. Mom just kept clicking away, capturing the moment almost in video format. Normally one would select one or two photos to print. I opted to use the full range so as to almost allow the moment to come to life on the page.
I needed to select a background that would not dominate and not be too busy, since the photos would add enough busyness to the spread. I chose two pages that I had made a couple of years ago. I found this lovely tissue paper in a shop and bought it on the spot. I brought it home and cut it to size, 12" x 12". I then fused it to white paper. I wrote a blog about this process which you can read here. I loved this sandy green background for these photos because it went to well with the tone of the photos themselves. A natural complimentary colour to use would be blue and more shades of green. The green would tie in with the background and the blue would accentuate the colour of the bathing suits worn by both father and son. I would of course need a craft knife and metal ruler as well.

I want to finally fit all of the smaller photos on an A4 sheet of paper which I will use as matting. However, I want to put each photo in its own frame first. That is why I measure carefully to determine how to fit it onto my page. I realize that I will need to trim 1 cm in length as well as width from each photo. This is done with a craft knife and metal ruler, being careful not to cut important parts in the photos away. Each photo now measures 5 x 7 cm.

I cut 7 frames for the 7 photos, each measuring 6 x 8 cm. The width of the frame is 1 cm all around. We have discussed this in detail in a previous blog which you can read here.


I do not really want to loose any of the size of the main photo, but at the same time I realize that I need to clean the photo up, loosing at least the shadow of the photographer. I crop the photos as much as possible, leaving it substantially smaller at 14 x 21 cm.

I will overcome the issue of lost size in my frames. I cut a first frame to be 2 cm wide all round, instead of my usual 1 cm.


I then proceed to cut a second frame which is even wider, measuring 3 cm all round. I have effectively stretched the photo to its original size with one exception; there now is nothing to distract from the focus point in the photo, which is not the shadow, nor the beach bag, but the people in the photo.

Everything gets its usual double-sided tape to attach it, cut into small strips with a dedicated pair of scissors.

I crop the A4 matting to measure 21 x 27 cm. This will allow me to fit all 7 frames onto the page, leaving 0,5 cm spaces around each of them.


If you are afraid of not being able to paste the photos in straight lines, I recommend making very feint pencil marks for yourself. I used the lines on my cutting mat as a guide.

Even though I am already putting double-sided tape on the elements, nothing is stuck down until I have finished preparation of ALL the elements and am 100% satisfied with the layout.


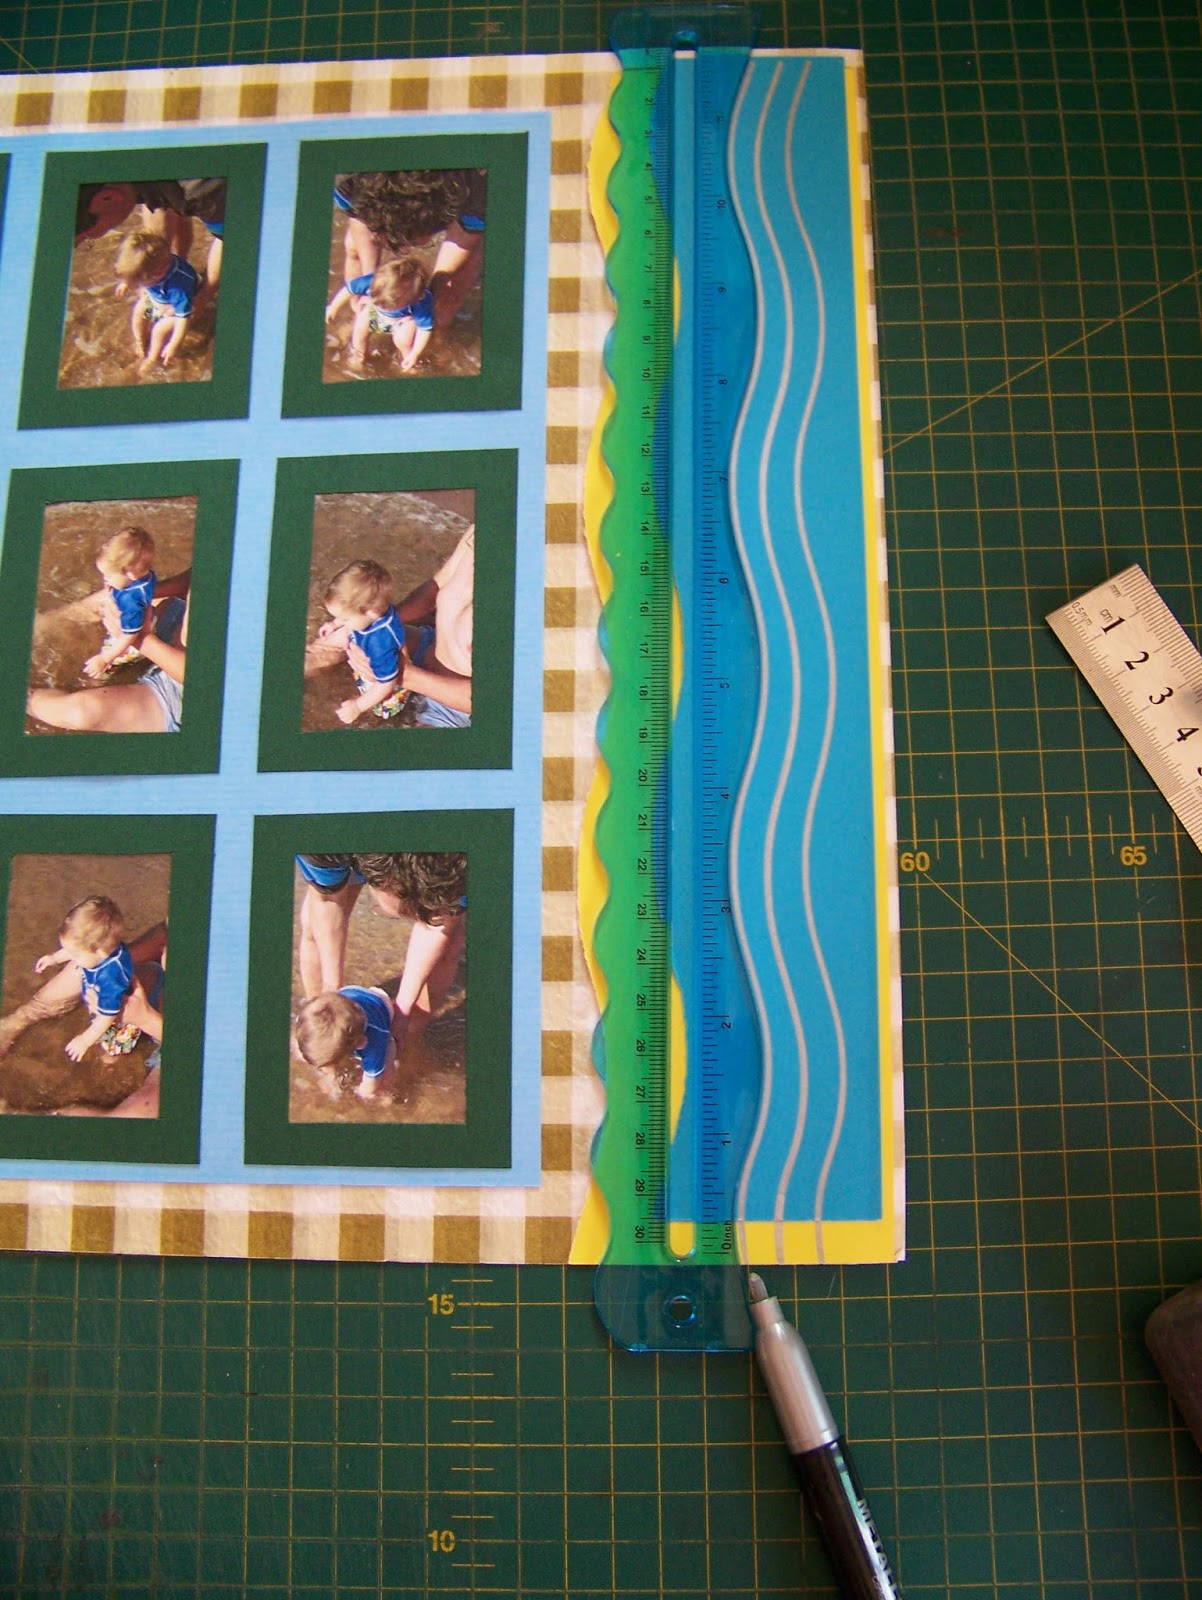
I am now going to add borders, but this time I intend to make them myself. I have a tearing ruler which mimics the waves of the ocean beautifully. I will use this tearing ruler and my Pentel Aquash brush with the water reservoir in the handle.

I use a blue paper which is just slightly darker than the one used for the frames and matting. This makes the page a little more interesting. I decide that the frame should be 5 cm wide and lay the tearing ruler on the 5 cm markings on the cutting mat. I then draw a water line next to the ruler.

The water softens the paper ever so slightly, making it much easier to get a tidy tear.

Hold the ruler firmly down with one hand and use your other hand to gently tear the page using the ruler as guide. (My second hand was working the camera here).

The borders get double-sided tape.

I decide to add 'beach' to my 'ocean' borders. I draw a water line on the 7 cm mark on the cutting mat, making the yellow 'beach' border 2 cm wider than blue 'ocean' border. I tear it the same way as the blue border.

Originally I intended the borders to go at the bottom of the layout, but I now found that the photos hid too much of them and opted to put them on the sides as shown.

I start adding embellishments. I like the silver birds, representing the carefree-ness of holidaying. I either need to change the silver on the birds or repeat the colour elsewhere. I opt for the last and decide to paint the camera silver. The colours of the tortoises are already repeated on the layout.

I have silver acrylic paint at my disposal and decide to use this, since it is also quick-drying. A flat brush will cover the surface quickly.

Since the silver is very transparent, I decide to paint the camera white first.

While the white undercoat is drying, I decide to use the tearing ruler to draw silver waves on the blue borders, enhancing the idea of ocean waves. I use a metalic marker for this purpose.
The undercoat having dried, I paint the camera silver (the colour develops more fully as it dries).

I paint the edges of the camera black.

I decide to add some cute photo corners to the photos. These are stickers and can easily be re-positioned if you don't get them straight on the first try.

I use the trusted Tombow glue to attach the embellishments to the page.

All that is left to do is to add some journaling to the page, telling viewers what it is about. This time I used alphabet stickers to build the words. I liked the idea of the words running into the photo, once again accentuating the fact that when we are on holiday we relax the reins a little and go with the flow of things.

In next to no time you have created another double-spread layout to be the envy of all your friends.

For more crafty ideas and great products, visit APrettyTalent.com.
Remember to keep nurturing your TALENT for making PRETTY things.
You can subscribe to this blog and receive regular updates by email by simply registering your email address at the top of the current blog.
No comments:
Post a Comment