Search This Blog

Friday 31 July 2015

Choosing between using markers or paint

I have been working quite a bit with markers over the past few projects and when it came time to paint two more sets of handles for handbags I was making, I wondered how far I could push the markers? Could they replace paint altogether? Whenever I ask questions like these, I put it to the test to find out the answers. I share my findings with you in this blog after I discovered there is no clear cut answer that applies to all.


I am working with two sets of handles. The red ones have been painted with acrylic paint. The green ones have been painted with fabric paint. This will stick to wood without a problem and can easily be used. Only pay attention to translucency. I draw my design on the handles with a pencil.


Normally I would paint the design in white acrylic to allow the colors to show clearly. This time I choose to use the white Posca marker with a bullet point. This works brilliantly and I am very satisfied with the results.


All of this changes when I get to the green fabric paint. I find that the marker struggles to fill the space and seems to slide off the paint. I decide to use the brush point white Posca marker to see if that would work. It does! Once again, I am very happy.


I decide to push my luck and add the color with Sharpie markers. I need to be very careful or the Sharpie will remove the white marker! Should I have given it more time to dry? It was already touch dry. I manage to color the design successfully, but the results are not spectacular and lacks the quality I am looking for. I think it is substandard and opt to redo it in acrylic paint.


I use a rigger brush for all the fine black line work.


I use a brilliant Angle Brush for the rest of the petals and leaves.


These results satisfy me. I'll seal the handles with Acrylic Gel Medium and they will be ready to use on the handbags.


Here is how the two handbags turned out.


These bags are available from Miekie Crafts on APrettyTalent.com if you click here.
For more crafty ideas and great products, visit APrettyTalent.com.
Remember to keep nurturing your TALENT for making PRETTY things.
You can subscribe to this blog and receive regular updates by email by simply registering your email address at the top of the current blog.

Thursday 30 July 2015

School Holiday Project 7: Folding and Decorating a Paper Windmill

Today I am going to show you how to make an old favorite; the paper windmill. This is a really great project to do with children. Older kids can measure their own windmills, but for younger ones I would recommend having the lines already measured and drawn in place. They need to practice cutting with scissors, so you should let them do this even if it does not turn out perfectly. They then get to color and decorate their windmills before they fold and assemble it as well. This project develops a number of fine motor skills and they will have a lot of fun. So will you!


You will need a straw, A4 paper, a ruler, a pencil and eraser, scissors, a split pin and coloring pencils.


Standard A4 paper is 21 cm wide. Crop the length to measure 21 cm as well. This will give you a perfect square.


Connect the corners diagonally.


Measure 5 cm from the inside on all 4 diagonal lines.


Draw a 1 cm line on each of the 5 cm marks.


Measure 2 cm on both sides of each corner.


Connect the 1 cm marks with the 2 cm marks.


A young child will become confused by all the lines and he/she will not know which ones will need to be cut and which ones not. Re-draw the lines that must be cut in another color to make it clear.


Punch a hole in the center of the windmill.


Cut out the corner strips as shown. (Don't  they make perfect ties?).


Be sure to show the child how the windmill will be folded so they can understand better how to decorate it.


The decorating of the windmill can be as intricate or as simple as the child wishes to make it, or as their abilities will allow. Try not to dictate this process, but rather allow them to discover their own abilities and creativity. Lots of praise is in order. Guard yourself against criticism. You do not want to discourage them.


With all the decorations in place, you can now fold the windmill one side at a time. Clumsy little fingers will not find this an easy exercise to do.


You can punch a hole on top of the previous one for the split pin to go through.


Cut a hole in the straw for the split pin to go in.


Insert the split pin. Do not tighten it too much or the windmill will not turn.


The legs of the pin at the back of the windmill.


Ready for play!


For more crafty ideas and great products, visit APrettyTalent.com.
Remember to keep nurturing your TALENT for making PRETTY things.
You can subscribe to this blog and receive regular updates by email by simply registering your email address at the top of the current blog.

Wednesday 29 July 2015

Cardmaking: Drawing and Making a Teenage Mutant Ninja Turtle Card

Last night my niece stormed in here in a huff and a puff. She needed a birthday card for a friend for the very next day! However, it had to be a card of Rafaello of the Teenage Mutant Ninja Turtles - for a girl! Okay then. Not being a fan of the Turtles, I had to do a quick Google search to make sure I got everything in place. It turned out so cute that I decided to redo the card in daylight and to photograph the steps so you could also benefit from what I learned. I show you how to draw the turtle step by step.


I use an A4 cardboard in bright yellow to fold the card from.


Fold the cardboard in half as shown to form an A5 card.


I use a pencil to draw a curved line with a tearing ruler.


Since I want a clean cut line rather than a torn line, I cut the curve out with a pair of sharp-nosed scissors.


I re-position the tearing ruler on the curve, a little bit away from the edge and draw a line in metallic green with a marker.


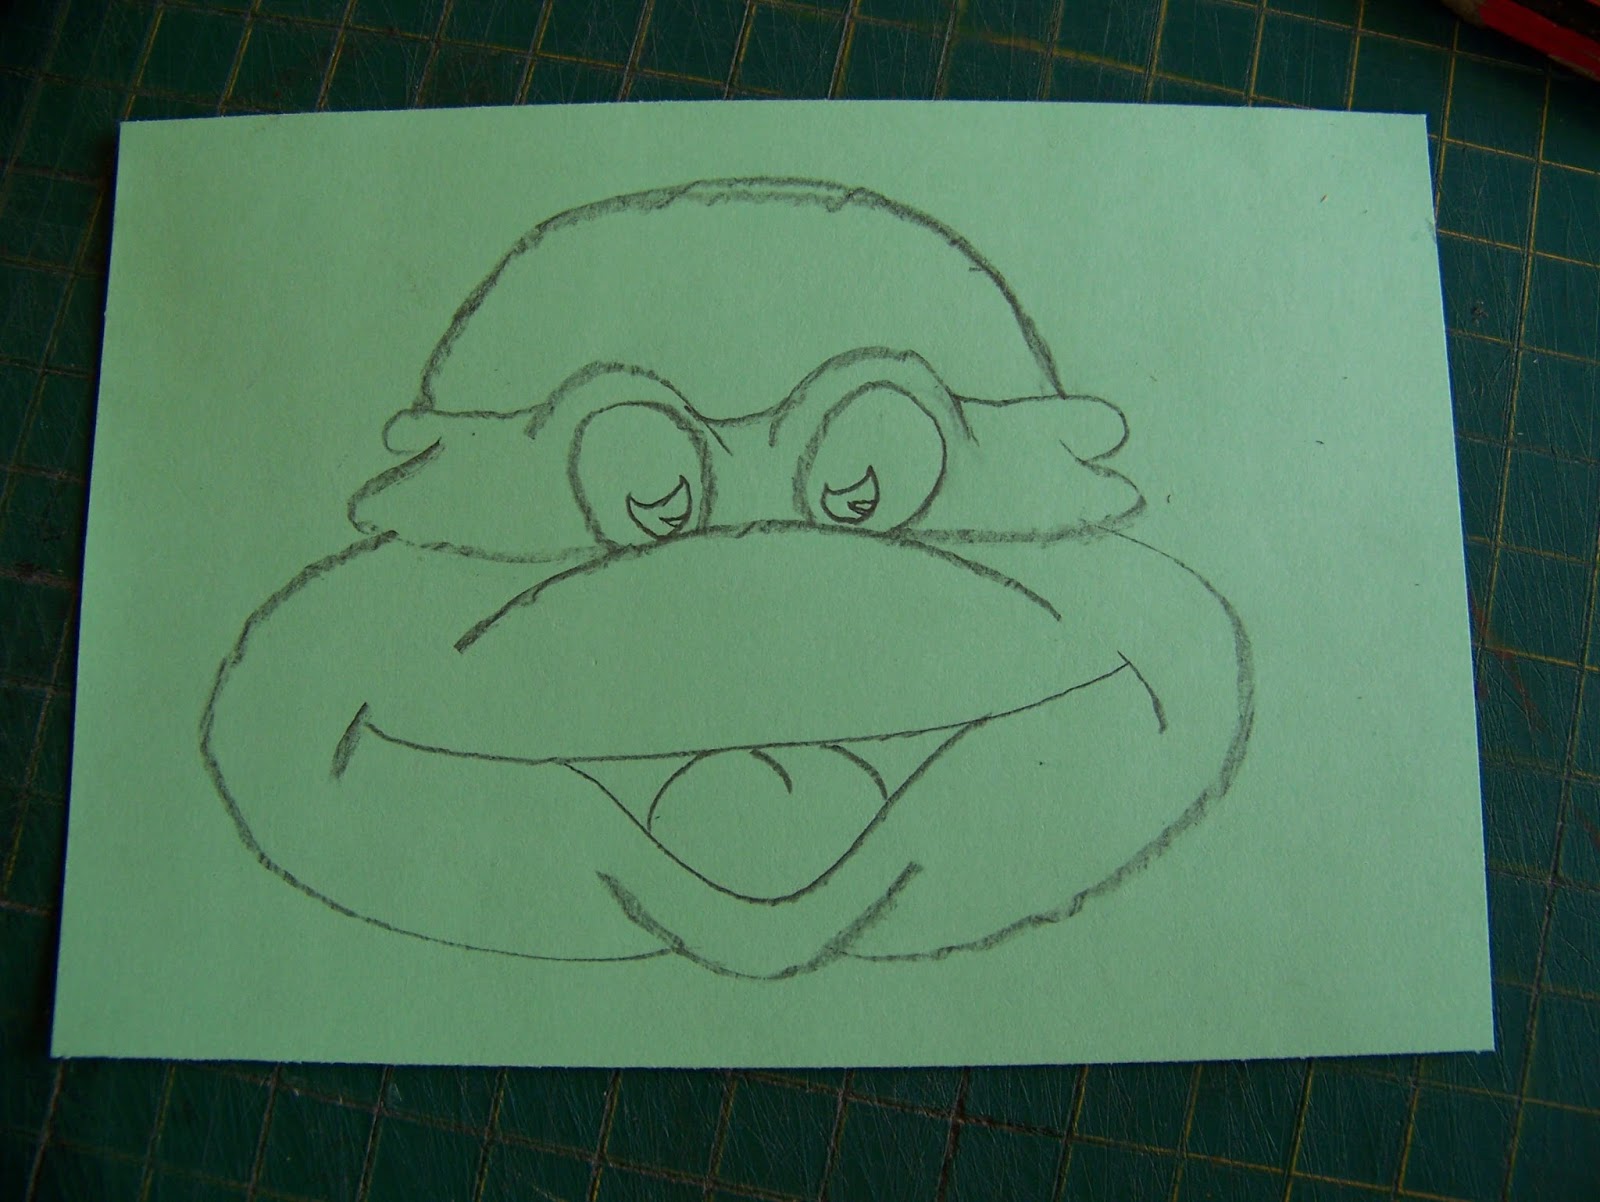
I am ready to start drawing the head of the turtle. I use a piece of green off-cut paper to do this on. Shape the top of the head.


Draw the bridge of the nose.


Draw the tops of the slits in the mask for the eyes.


Draw the top folds of the mask.


Connect the top of the head with the mask on both sides.


Draw the bottom folds of the mask.


Draw the line of the nose/mouth area.


Connect the bottom of the mask with this line on both sides.


Draw the chin.


Draw both cheeks to connect the mask with the chin.


Draw the corners of the mouth on both sides.


Draw the upper lip.


Draw the bottom lip.


Draw the tongue.


Draw the eyes.


Draw the pupils of the eyes.


Draw a speech bubble on another piece of off-cut green paper. It should be about the same size as the head.


Find an off-cut piece of red paper. Draw the head again on a smaller scale on this paper.


Draw the neck of the turtle.


Draw the circles for the neck opening in the shell.


Draw the shell of the turtle.


Draw the tail of the turtle.


Finish the bottom of the shell with a double line.


Draw the feet.


I use an artist's pen to redraw all of the lines in black, but any marker or felt tipped pen can be used for this purpose as well.


What the drawings look like with the lines accentuated in black. Note that I have also colored the pupils and dark recesses of the mouths.


I use a white marker to color the whites of the eyes.


I use Derwent Inktense pencils to color the drawings since these pencils will retain their brilliant vibrancy, even when used on other bright colors. I use Poppy Red for the mask.


I color the tongue with Fuchsia and then tone it down by coloring over it with Antique White.


On the red turtle, the green areas are done in Apple Green.


The shell openings are colored in Ink Black.


I use the black marker from before to add hearts to the shell. This card was intended for a girl after all! You may use any shape you prefer.


I randomly color the hearts in four different colors; Iris Blue, Tangerine, Sherbet Lemon and Violet.


Cut the turtle, the head and the speech bubble out.


Write your message in the speech bubble.


I wanted to raise the head and speech bubble and mounted them on 3D double sided tape.


I used the same metallic green marker from before to add frames to the card. This adds a nice finish.


The red turtle is stuck to the inside of the card. This is much more tame turtle and it is a bit tongue in the cheek, adding a comic element to the card.


I draw the stem and leaves of a flower in Teal Green.


The center of the flower is drawn in Sherbet Lemon.


The petals are drawn in Poppy Red. Remember to add a few half eaten petals. This adds to the comedic element.


The card is now ready for a personal message to be added.


For more crafty ideas and great products, visit APrettyTalent.com.
Remember to keep nurturing your TALENT for making PRETTY things.
You can subscribe to this blog and receive regular updates by email by simply registering your email address at the top of the current blog.