
I start my drawing on a feint yellow paper. This is to make it easier for me to mimic the flesh color on the face, but you could just as easily work on white for all the difference it made to the final product. I draw a circle for the head with a drawing pencil. Keep going round and round till you find a shape you like.

I now draw two smaller circles for the ears.

Shape the center of the bow.

Draw the tops of the bow.

Draw the downward bend of the bow.

Draw the bottom bend of the bow.

Complete the bow.

Clean up your drawing by erasing the excess lines with a soft eraser.

Draw the heir line under the bow and the cheeks.

Complete the hair line and cheek line.

Erase the lines under the ears so the hair and ears is a continuing space.

Draw the chin and nose.

Erase the line above the chin and draw the smile.

Draw the bottom of the mouth and the tongue.

Two elongated ovals form the eyes.

Draw the pupils and eyelashes.

Add the fold lines to the bow.

I am going to add a few accents with my Sharpie markers. If you don't have a nice set like this, you can achieve similar results with felt pens (kokis).

I use a deep pink Sharpie marker to accentuate the shadow areas of the ribbon.

I use the black Sharpie marker to accentuate a number of areas on the face, although I do not use the marker to go over every pencil line. I do not want the face to appear hard, but want to retain some softness. Feel free to use your own discretion here.

I use a white Posca marker to add the white of the eyes.

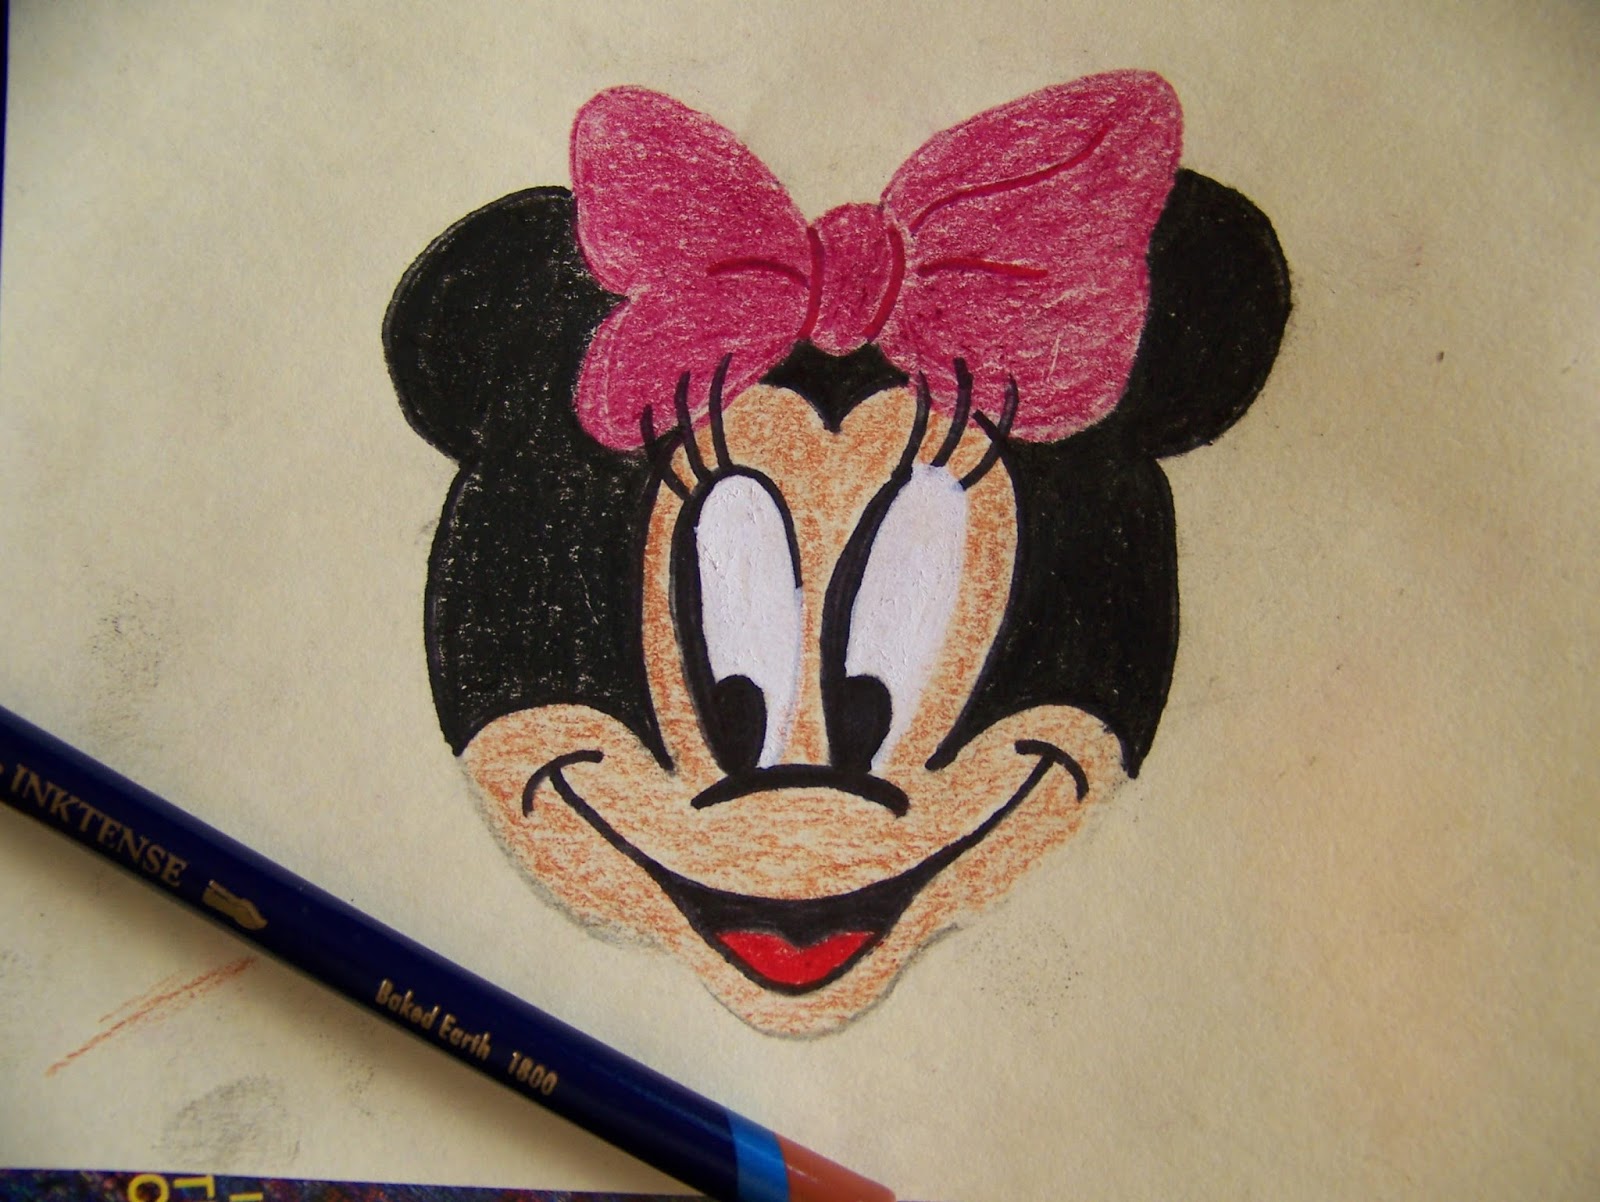
I will use Derwent Inktense pencils to color the picture with. I love the intense vibrant colors of Inktense for projects like these.

The ribbon is colored in Fuchsia.

The hair and ears are done in Ink Black.

The tongue is colored with Poppy Red.

The face is very lightly shaded in Baked Earth. This color can be much too intense of you apply it too dark. This concludes the drawing of the face, but I will show you in a few steps how I used this cute drawing to decorate a birthday card.
Cut the face out with sharp-nosed scissors.
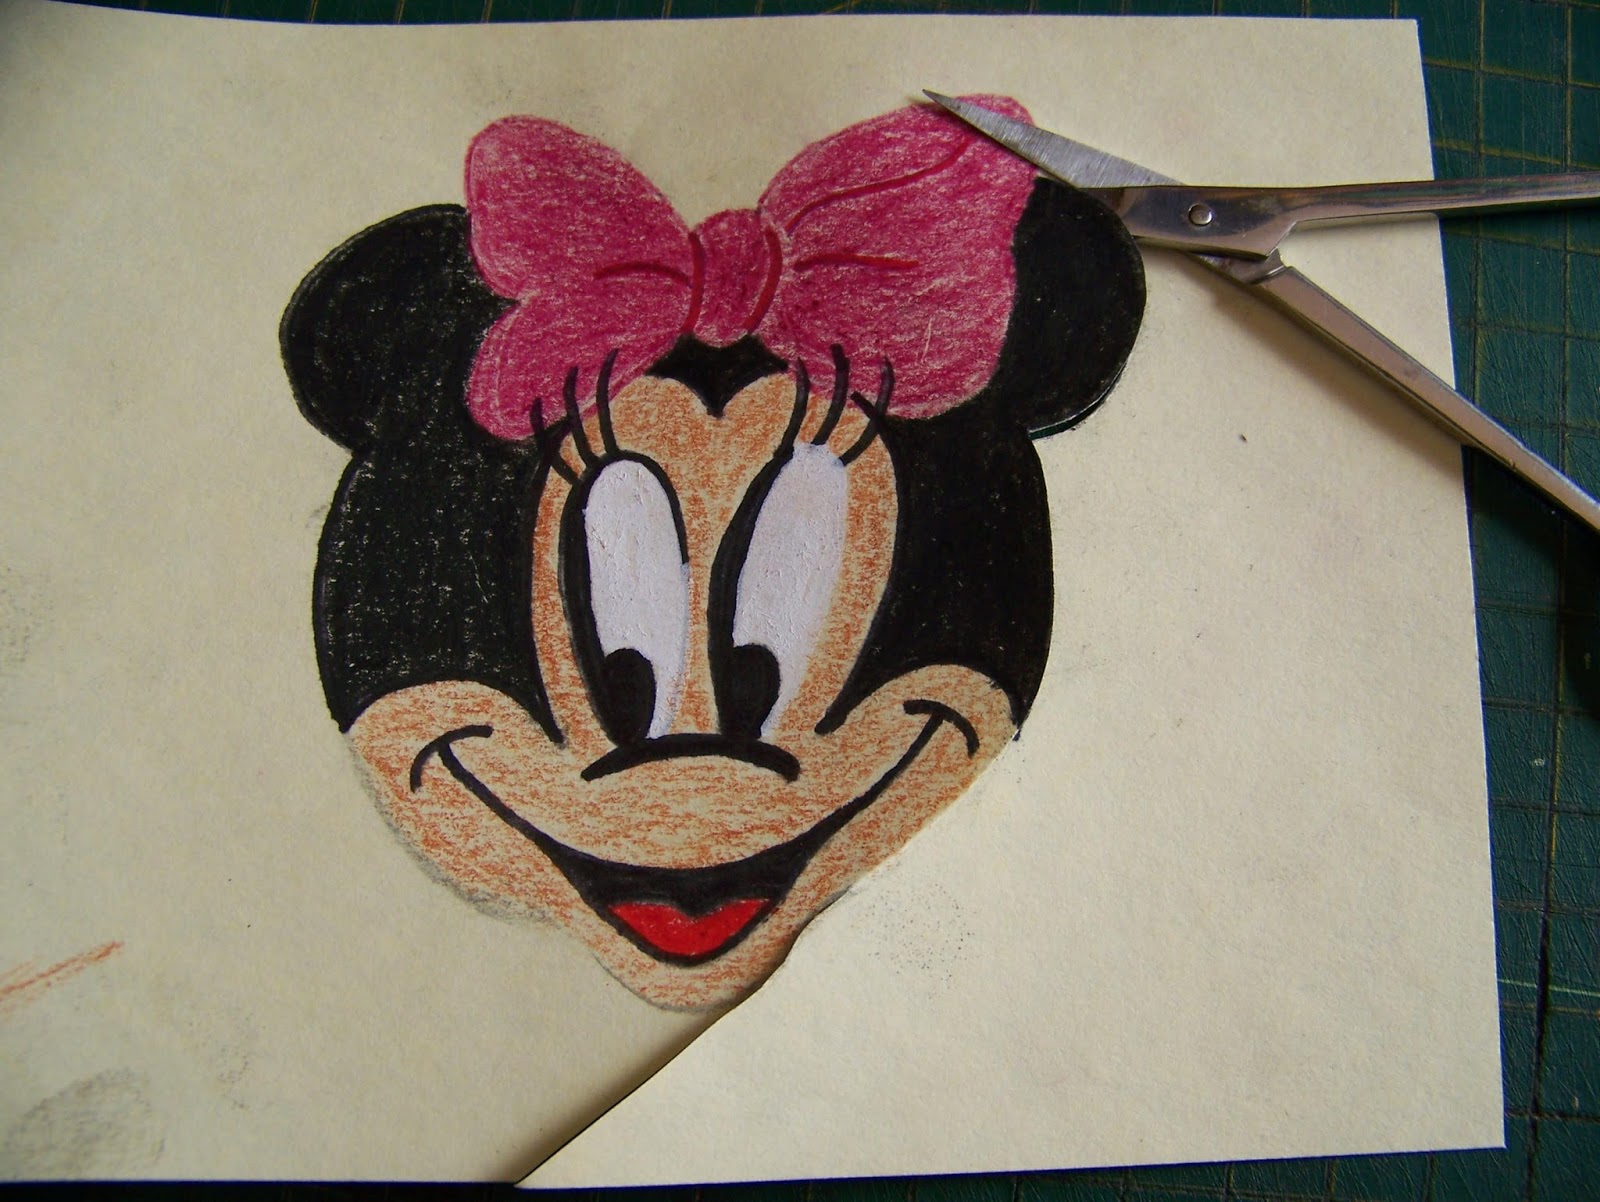
Isn't she pretty?

In the next blog I will show you how to draw her complete body. If you enjoyed this, you must not miss tomorrow's blog.

I use an A4 cardboard in deep pink which I fold in half.

I measure the face I drew. It measures approximately 10 cm. The matting will have to be bigger than this.

I set my circle cutter to 12 cm. This will cut a circle with a radius of 6 cm. If you do not have a circle cutter, you can use a compass and cut the circle out with a craft knife or scissors once you have described it.

The circle cutter works much the same as a compass. You stick the needle side in the center of your page. Instead of having a pencil lead on the other end, the cutter has a sharp blade and as you describe the circle, the paper is cut in a neat circle. You should actually hold the cutter on the black handle, but I struggled holding it in place with the camera in the other hand.

Perfect, isn't it? Very nifty tool!

I want to double-mount the picture. I therefore set my circle cutter to 13,5 cm to cut a slightly bigger circle from plain pink.


I use double-sided tape to glue the pieces of the card together.

Pink and white polka dots (or red and white) are signature Minnie Mouse.

I use the off-cuts from the project to cut a journaling block from.

I have small piece of polka dot paper to go on the journaling block as well. In time a little girl's name will be added here.

For now I simply finish the card with two rhinestone embellishments. Remember to check back in for tomorrow's blog when we do the inside of the card and draw Minnie Mouse's body as well.
For more crafty ideas and great products, visit APrettyTalent.com.
Remember to keep nurturing your TALENT for making PRETTY things.
You can subscribe to this blog and receive regular updates by email by simply registering your email address at the top of the current blog.
No comments:
Post a Comment