I start by folding an A4 page in half.
I use an off-cut piece of paper from a previous project to cut the cake from. It measures approximately 6,5 cm x 8 cm.
I cut two strips of coordinating paper to cut the icing from. These measure 2 cm x 9 cm each. I use a craft knife, metal ruler and cutting mat for this purpose.
Uneven swirls will mimic icing for the cake.
Cut the icing out with a pair of sharp-nosed scissors.
I use Tim Holtz Distress Ink in Milled Lavender to ink the edges of the icing.
I attach all paper objects with double-sided tape.
I cut the candle from some packaging cardboard that I recycled and used in a scrapbooking project. This off-cut is large enough to cut what I need from. The candle only measures 1 cm x 5 cm.
This sparkly off-cut will work brilliantly to cut the flame from.
I draw the flame on the back of the sparkly paper. Note that I lengthen the 'foot' of the flame so it can slide behind the candle.
This is what the cake looks like when fully constructed.
I cut a piece of felt for the background of the cake. It measures 13 cm x 11 cm.
Two more paper strips is cut from coordinating patterned off-cuts. This time it measures 13 cm x 3 cm each. These two strips on the side will form a brilliant background for journaling to be added.
I now cut a length of ribbon for the bottom of the card. This will create the impression of a table cloth for the cake to rest on.
I am not adding any journaling to the card yet, since I do not have a purpose for the card yet. Can you see how well the two side strips will work for journaling later on?
I have this odd shaped off-cut patterned paper from a previous project. I turn it over so I can draw on the white back of the paper. I want to design the pop-up bear and start with a circle for the head.
A larger circle forms the tummy of the bear.
Two small circles make up the feet of the bear.
Add the legs.
Add the outsides of the arms.
Form the hands.
Complete the arms by drawing the insides of the arms.
Do not forget the distinctive ears.
I place the paper with the drawing of the bear on a second off-cut paper. The right sides of the two pieces of paper should face each other. This is very important!
Hold the two pieces of paper tightly squeezed together and cut out the bear.
When I move them apart, you can see that I have two similar bears.
I draw the features of the bears in with a metallic marker.
I find that the marker gives me the soft lines that I want, but that I need to define the features more clearly. I therefore go over the features a second time with a Graphic Marker.
I cut two tiny pieces of paper for the signs that the bears will hold up. They measure 3 cm x 3 cm each.
The edges are once again distressed.
I use a brush tipped marker to write the messages on the signs. Note how I leave the centers open. This is because the hands of the bears will cover the writing if I use that space. These signs read "Congratulations".
I use a craft knife to cut the hands loose.
I can now slip the signs in under the hands to create the impression that the bears are holding up the signs.
Double-sided tape will secure the signs to the bears.
Done!
I cut two strips of paper from the same paper I used for the card so it will blend into the background. These will become the levers that will make the bears pop up. The measure 12 cm x 2 cm each.
I make a 1 cm foldline where I will attach them to the card.
The front.
The back.
The bottom.
One lever is attached right next to the fold in the card.
The other lever is moved a little back to allow the bear to pop up when the card is opened up.
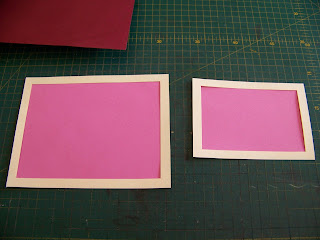
The following steps are optional. I create a framed background for the message of the card to go onto. This lighter shade of paper will make it easier to read the message. I also make a smaller framed background to go on the top flap. This is simply so the bear will have a frame to pop up against.
This is the inside of the card as seen from the back.
This is the inside of the card as seen from the front.
And this is what the card looks like from the outside.
For more crafty ideas and great products, visit APrettyTalent.com.
Remember to keep nurturing your TALENT for making PRETTY things.
You can subscribe to this blog and receive regular updates by email by simply registering your email address at the top of the current blog.


No comments:
Post a Comment