
I found this color by number page in an adult coloring magazine and decided to attempt it. I can honestly say that I hated every minute of it and this will probably be the first and last time I do a color by number picture. Nonetheless, the end result is not a complete loss. I like the colors and can turn this very ugly page into a pretty little gift box.

A quick word about coloring by numbers before I move on to the box. I used Derwent Coloursoft pencils to color the picture with. These pencils are conveniently numbered. This makes it easy to write the number down of the pencil that you are working with. Other sets may have names for the colors. It is a good idea to keep a record of the exact shade of pencil you used so it is easier to find it again.

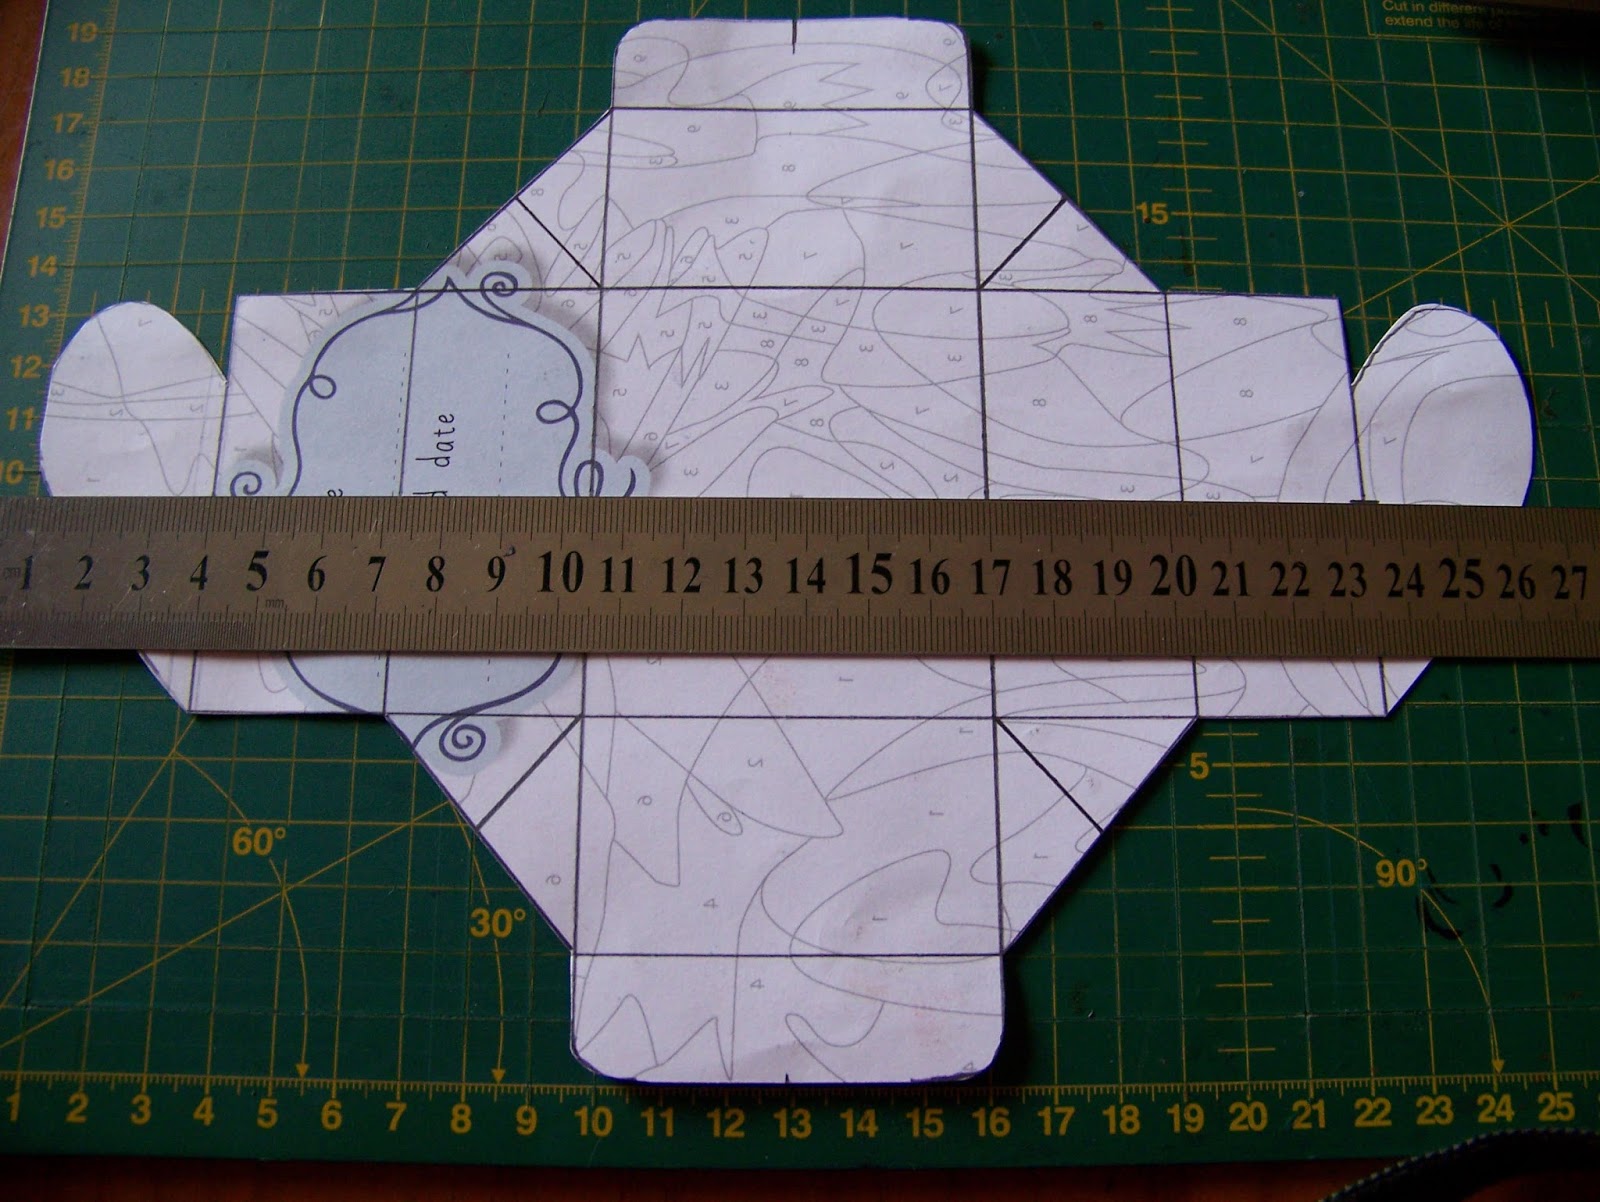
The first step is to trim the white edges away. I do this with a metal ruler and a craft knife.

I then use my cutting mat with its convenient guidelines to divide my page into 8 equal blocks.

I now mark off 2 cm at the top and bottom before dividing the middle into four equal sections.

The next step is to round the top and bottom flaps. I connect the corners diagonally with crossing lines. These will become fold lines to fold the corners away.

I cut the pattern out at this stage.

I measure the center square of the box and find it measures 6,5 cm x 7,5 cm. I cut a separate piece of paper to these exact measurements.

This paper is folded in half and I draw half a heart on the fold.

I cut this heart out on the fold.

I then open the heart to make sure that it is a satisfactory shape.

I then proceed to trace the heart halves on the box flaps.

Cut out the hearts.

Mark the centers of the hearts.
Cut the left heart open to the halfway mark from the top. Cut the right hand open to the halfway mark from the bottom.

Fold the fold lines neatly over a ruler.

Double check to make sure the corners will tuck in neatly.

I applied double-sided tape to the side flaps. I now tuck the corners in under the flaps and then secure the flaps and corners with the double-sided tape.

Slide the hearts with a slight twist into each other.

The hearts serve both as decoration as well as latch to keep the box closed. Now that ugly coloring in page looks quite cute and has been turned into a useful and practical gift box. That is reversing the effects of wasted time and effort!

For more crafty ideas and great products, visit APrettyTalent.com.
Remember to keep nurturing your TALENT for making PRETTY things.
You can subscribe to this blog and receive regular updates by email by simply registering your email address at the top of the current blog.
No comments:
Post a Comment