The first thing I do when developing a design is to set a uniform border around the page. I draw my borders on 19 cm x 27 cm, so as to ensure that it will print well on any printer capable of printing an A4 page. I use a black Sharpie bullet point marker, a ruler and a cutting mat to create tidy borders.
I started by drawing the cows I designed a while ago into the frames. I have had requests for these from readers who have no interest in drawing themselves, but who would still like to use the designs. My initial drawing was in pencil.
When I was happy with the drawing I redrew it with the black Sharpie marker from earlier.
The designs for the cows are available here.
I have been working on this design a while ago and added it to the shop as well. You can download the teapot and cup here.
I love the idea of lopsided pots filled with simple flowers. I therefore set out to design a set of three of these drawings. I again started with pencil drawings.
Once happy with the pencil drawing, I redrew it with the Sharpie marker.
All that is left to do is to remove the pencil lines with an eraser.
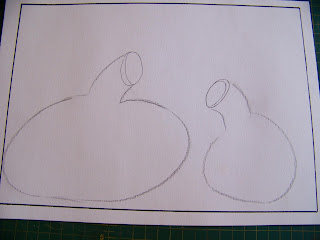
Perhaps you are interested in designing or drawing your own lopsided pots? Let me walk you through the steps. I start with the top openings of the tops.
This is followed by the bottlenecks of the two pots.
I then draw exaggeratedly fat bodies for the pots.
Add the rim to the opening of the tops of the pots.
The delight of these vases are ensured by the light reflections visible on the pots. I therefore make sure to draw them in.
This is followed by the stems of the flowers.
I then drew the centers of the flowers.
This was followed by the flower petals. Keep it loose and haphazard to be remain in line with the lopsided pots.
Completing the petals, I realize that the stems cause too much havoc in the center of the drawing. I decide to rectify this when drawing the final lines with the Sharpie marker.
You can see here that I have altered the center of the design to clean up the messy lines.
This design is ready to be scanned as a PDF document to go onto the 'shelves' in the shop as a digital download.
For the last of the trio of designs, I once again start on the pots.
This is followed by the stems of the flowers.
I then add the flowers, in this case a shape that reminds somewhat of a tulip. Start with a semi oval shape.
Add an oval to the top of the flower.
Add detail to the inside of the flower.
Add outside petals to the flower.
Add a second layer to the top of the petals.
Complete the rest of the flowers in like suit.
It is time to redraw the design with the marker.
Erase the pencil lines and the set of three designs are ready for downloading in the shop. This set of three Lopsided Pots is available here in the shop.
These designs are available from APretyTalent.com under Digital Downloads.
For more crafty ideas and great products, visit APrettyTalent.com.
Remember to keep nurturing your TALENT for making PRETTY things.
You can subscribe to this blog and receive regular updates by email by simply registering your email address at the top of the current blog.


No comments:
Post a Comment