
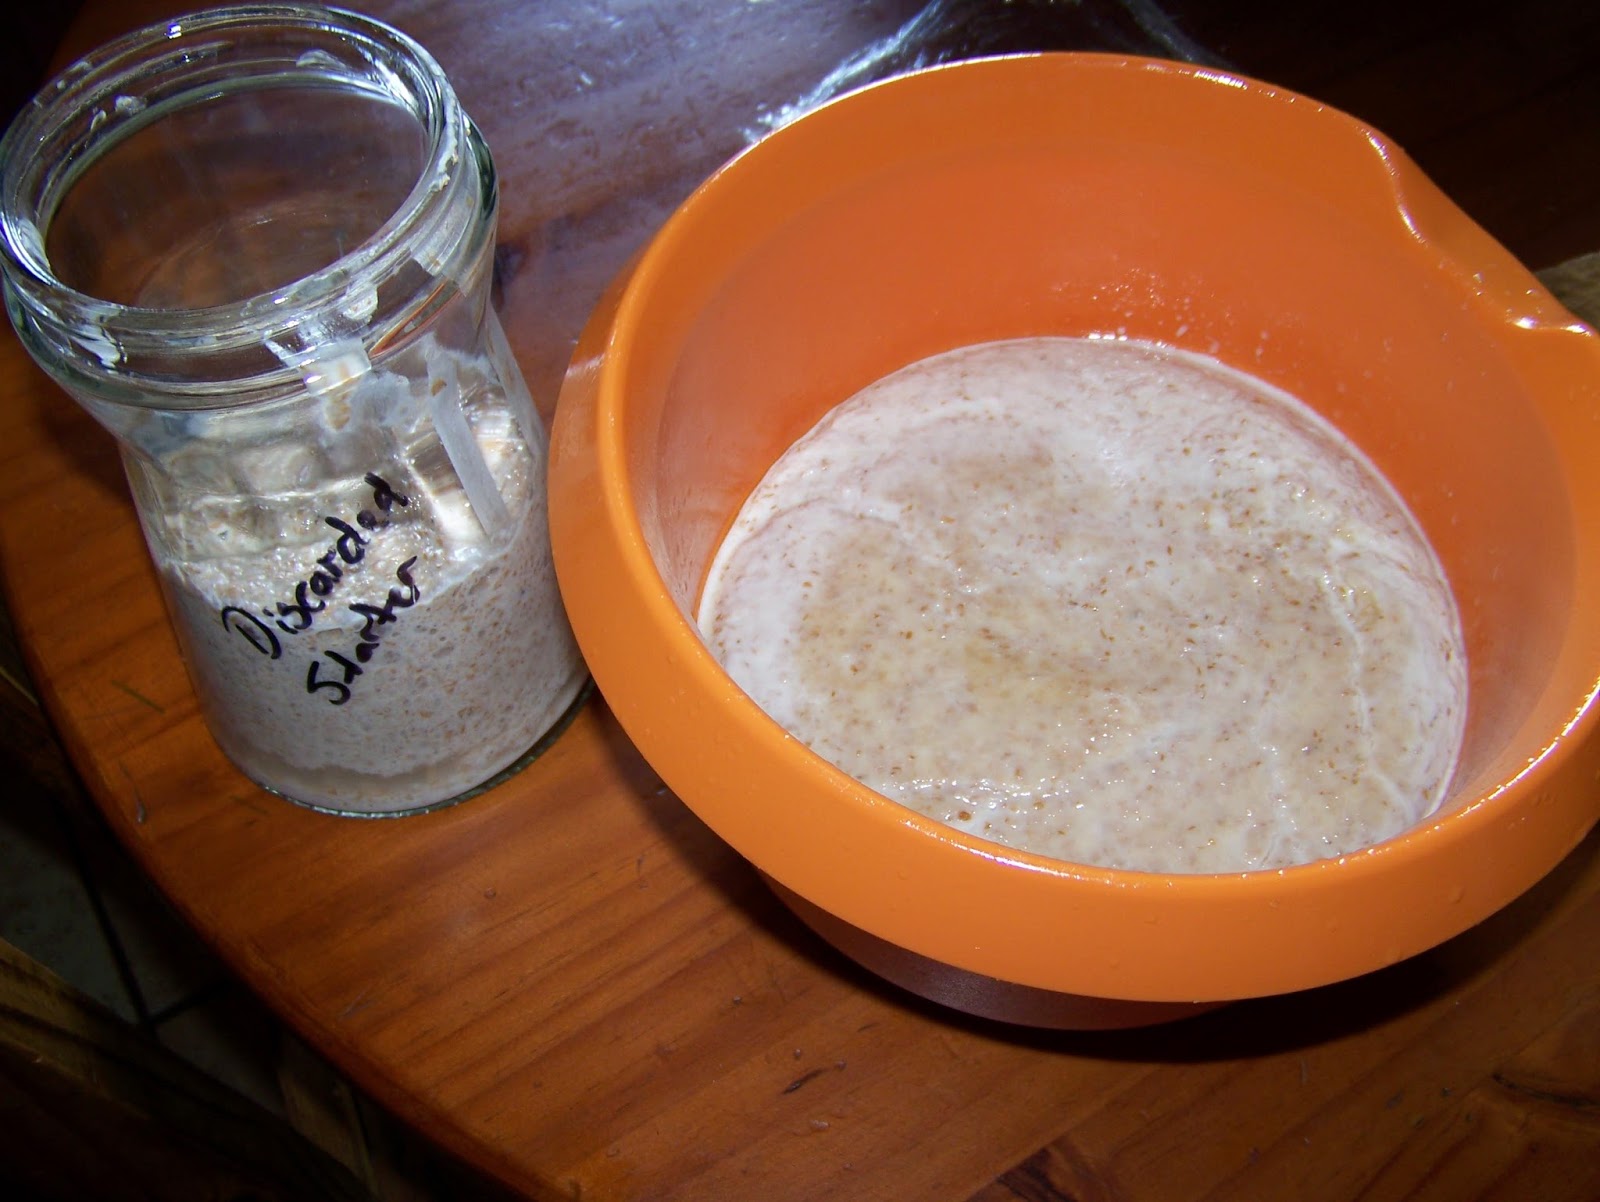
I started by emptying out the whole container of discarded starter into a mixing bowl. I had just added a good amount of active discarded starter to the jar and had every expectation of the discarded starter succeeding in giving rise to the loaf.

I then added 1 cup (250 ml) each of White Bread flour, Nutty Wheat and Cake flour.

I also added 2 teaspoonfuls of salt.

All of this was mixed up with some tepid water standing by to be added if necessary. I would add enough water to bring the dough together if it proved too dry. If it proved too wet, I would add more cake flour.

Having brought the dough together, I kneaded it for about ten minutes on a lightly floured surface.

I then put the dough in a bowl that had been oiled with olive oil. The plastic used to cover the dough had also been oiled.

The dough was left to rise in a warm dry place. After about 4 hours, there was still no noticeable difference.

By this time I had already fed both my potato and apple starters again, and had some more active discarded starter to work with.

The newly discarded starter was also added to the bread dough.
I was heartened by the fact that this time I could actually see the mixture bubbling. However, it was obviously too wet for a proper bread dough. I allowed it to sit like that for about 4 more hours.

I then added another cup of White Bread flour.

This was mixed in thoroughly and covered. I poked some holes in the plastic to allow the bacteria in the air to get to the dough. This mixture would be left overnight, as I had by now quite run out of daylight.

I awoke to this sight the next morning and was thrilled by how much the dough had expanded.

Before getting my hands dirty, I prepared two baking tins by spraying them with a non-stick coating and dusting them with flour.

I then added enough Nutty Wheat to the dough to be able to turn it into a kneadable dough.

I kneaded the dough for 5-10 minutes and then divided it into two balls.

The smaller ball was formed into a loaf and put in the loaf pan. I covered it with plastic and put it in a warm dry place to rise.

The other ball was formed into a long roll and then divided into two equal portions.

I rolled each of these out in succession.

I then rolled them both up so I would have two long snakes/worms of dough.

The two rolls were laid out in a cross, intersecting in the middle.

I folded the bottom ends over to opposite sides.

I then did the same to the other two ends. This was repeated continually until the dough was too short to cross over. The ends were simply tucked in.

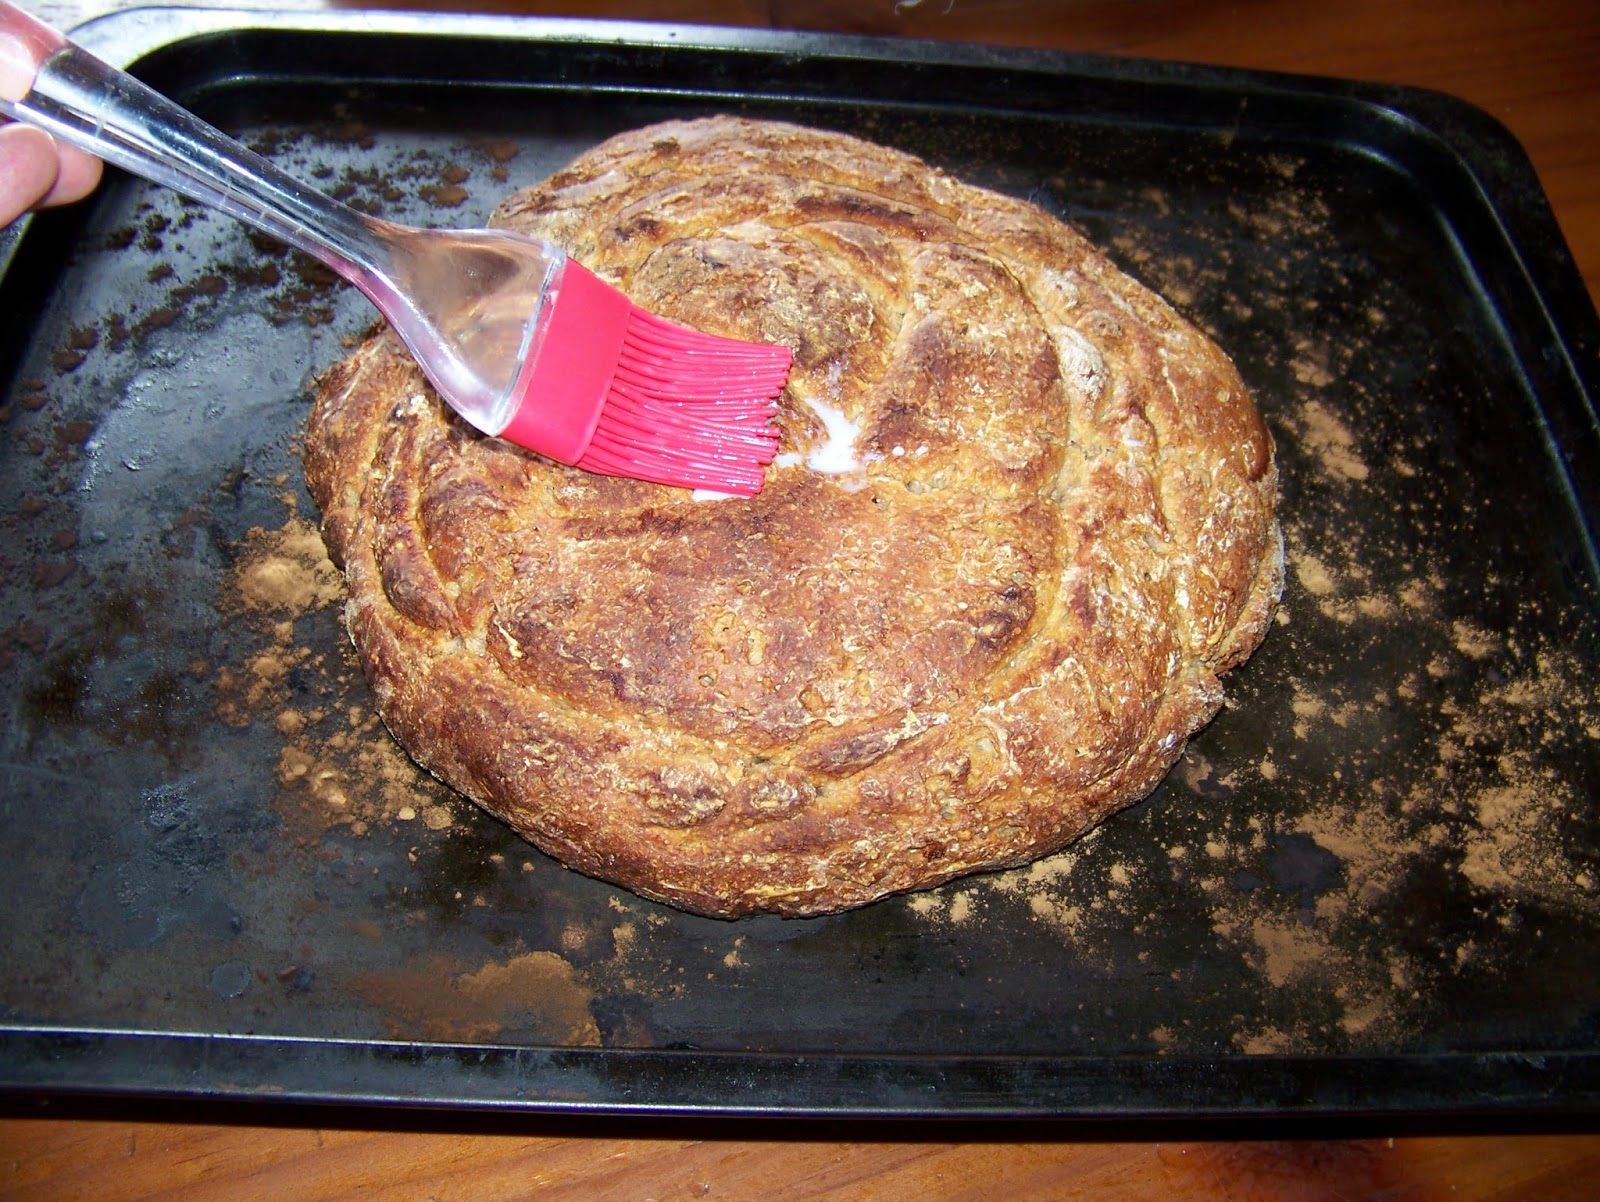
This gave me a nice round plaited bread, which would be a brilliant tear and share shape for a side dish at the braai in the afternoon.

I put the loaf in a plastic 'tent' and left it in a warm dry place to rise.

Once the dough had risen, I baked it in a preheated oven at 220°C for 30-45 minutes.

In the meantime, I mixed some sugar and milk to brush over the loaf as soon as it came out of the oven.

This brushing would give the loaf a brilliant sheen and the sugar would add a bit of sweetness to the tangy bread.
The other loaf was treated in the same way, but baked a little shorter.

You should turn the loaves out on a wire rack to cool. If you want to ensure a slightly softer crust, as this one could be a bit chewy and hard, I suggest you place a damp cloth over the loaves once the milk has subsided. This will soften the crust. Remove as soon as the bread is cold and store like any other bread.

I simply made the first tear in the loaf and served it with butter. It was a great hit around the fire and under the trees as we waited for the meat on the grill.
For more crafty ideas and great products, visit APrettyTalent.com.
Remember to keep nurturing your TALENT for making PRETTY things.
You can subscribe to this blog and receive regular updates by email by simply registering your email address at the top of the current blog.
No comments:
Post a Comment