My niece and nephew got out of the pool today and very casually informed me that they were now coming over to do some art. Well then ... this aunt has never been one to shy away from an art challenge. It was game on! I racked my brain walking home with them and decided it would be a great idea to have them make a birthday card for their mom, who had a birthday coming up the following week. Grabbing a quick cup of coffee before going to the studio, I retrieved the peel-back lid from a fresh tin of coffee and immediately knew that introducing them to joy of embossing was just the thing to focus on.
I pulled out a couple of embossing plates and gave them the instruction to each select one design that they liked while I gathered the things we would need for the card.
I used a pair of blunt scissors to cut the peel-back lid from the tin of coffee in half. Here is a golden tip: blunt scissors will sharpen effortlessly if you cut foil with them!
It goes without saying that we would need the embossing tools.
Not wanting to take over, I showed them how to emboss on the tab. Simply rub the ball on the embossing tool over the plates and follow the lines of the indentations. Hold the foil very still in one place while doing so. This proved to be the tricky part. Fortunately the foil was very patient and tolerated a number of do-overs.
The smallest one had problems working with the embossing tools given to them and I went in search of this to give to her instead. That seemed to do the trick.
Needless to say, I had to demonstrate how the tool worked. This one works best if you keep making small circular movements.
The brother had his done quite quickly after I assisted in keeping the foil still.
The sister's took a little longer as she is a bit of a perfectionist, but eventually hers was done as well.
I then cut and folded a piece of cardboard to serve as a card with a center opening.
I used the trusted old Tombow glue to glue the embossed foil sheets to the cardboard.
I then simply had to trim the excess off the sides with my scissors.
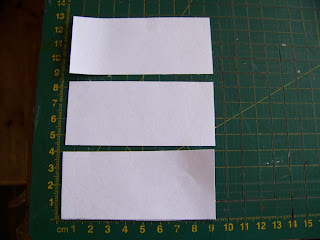
I then cut three strips of printer paper to fit inside the card. Each child would add a drawing to the inside of the card and I would use the remaining one to write birthday wishes and their names as they were not able to write yet.
They were given some markers to draw with.
I tried my best to keep my writing in line with what I saw them doing with the markers.
This took great concentration ...
... from both of them.
I could finally paste the papers into the card with normal craft glue.
I had to wait a little longer for our perfectionist who insisted on drawing a second drawing on the back as well. Her card is able to flip, like a book, so as to reveal the drawing on the back as well. Note to self: always remember to be flexible when doing art with kids, allowing them to express themselves however they choose. This may not be the world's prettiest card, but it is sure to warm any mother's heart!
What I love about the outside of this card is how easy, cheap and pretty it is! I mean, what is not to like about all of that?
For more crafty ideas and great products, visit APrettyTalent.com.
Remember to keep nurturing your TALENT for making PRETTY things.
You can subscribe to this blog and receive regular updates by email by simply registering your email address at the top of the current blog.


No comments:
Post a Comment