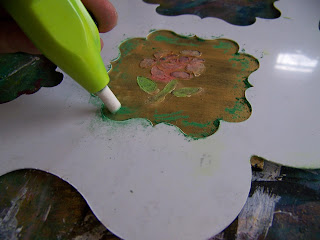
We do a couple of interesting things on wood, such as engraving, chalking and inking, before we use the wood panel on a birthday card. Interested? Let me show you more.
I use a wide flat brush to paint a square piece of masonite with black gesso.
I then use Gold Acrylic Paint to cover the gesso with.
Notice how I allowed the black to show through the gold by painting only a thin and uneven coat of gold.
I will be using my Chizzel-it set for most of this project, but all of these tools are available in other brands and manual tools as well.
This is a battery operated tool with different heads that are attached.
I start with the engraving head.
I position a metal stencil on the wooden square and chisel away with the engraving tool.
You can see that the wood has been engraved right down and into the wood surface.
I now use a small brush to stencil the background white using acrylic paint. This is to make sure that the rest of the colors will appear bright.
I put the little brush head on to stencil ink from an ink pad onto the design.
This battery operated brush works exactly as any normal stenciling brush.
I am not sure that this is bright enough for my liking, but I have a few more tricks up my sleeve.
I use the buffing tool and my soft pastels next.
I use yet another stencil for this step, wanting to create a border around the design.
I loosely powder pastel inside the border.
I then use the buffing tool to give me a chalked finish.
I like the chalked effect, but I want a sharper edge and brighter colors.
I decide to turn to my Inktense Blocks.
Using a medium round brush, I wet the brush and pick the color up from the blocks, exactly as I would watercolors.
As the design is engraved into the wood, it is very simple to stay inside the tiny lines.
I then place the border stencil back on the design. I use the engraving tool to chisel into the wood all along the frame.
Now the chalking makes more sense!
I use a cutting mat, craft knife and metal ruler to cut a 12"x12" craft paper in half.
The double-sided paper is then folded in half.
I use double-sided tape to attach a journaling tag to the card.
I love how this tag mirrors the design on the masonite embellishment.
I use Tombow glue to attach the masonite square.
Things are starting to come together.
I lay down two rows of glue dots.
I use the glue dots to stick down some rhinestone embellishments and that concludes the card. Fun, wasn't it?
For more crafty ideas and great products, visit APrettyTalent.com.
Remember to keep nurturing your TALENT for making PRETTY things.
You can subscribe to this blog and receive regular updates by email by simply registering your email address at the top of the current blog.


No comments:
Post a Comment