
As I will be using water to dissolve my pencils, I need a sturdy paper to work on, that will not buckle and distort when wet.

I used only the F pencil in my set of drawing pencils.

I drew the top of the head first to determine height. Then I drew the prominent tail feathers. I then connected the head to the tail with the neck feathers and drew the facial detail and comb. I then drew the wing, followed by the chest. Then I filled in the bottom tail feathers. Lastly I drew feet. When dividing a drawing into sections, as I have done, a seemingly intricate picture can become a collection of very simple lines.

You can use any water-soluble pencils, but I love working with Derwent Inktense pencils. The reason is that the colour can not be lifted again after it has dried. This means that I have the advantage of colours remaining fixed, instead of blending, when I introduce more colours.

I start by laying down Iris Blue. Note how I pay attention to the direction of the lines, even though I will be dissolving the strokes.

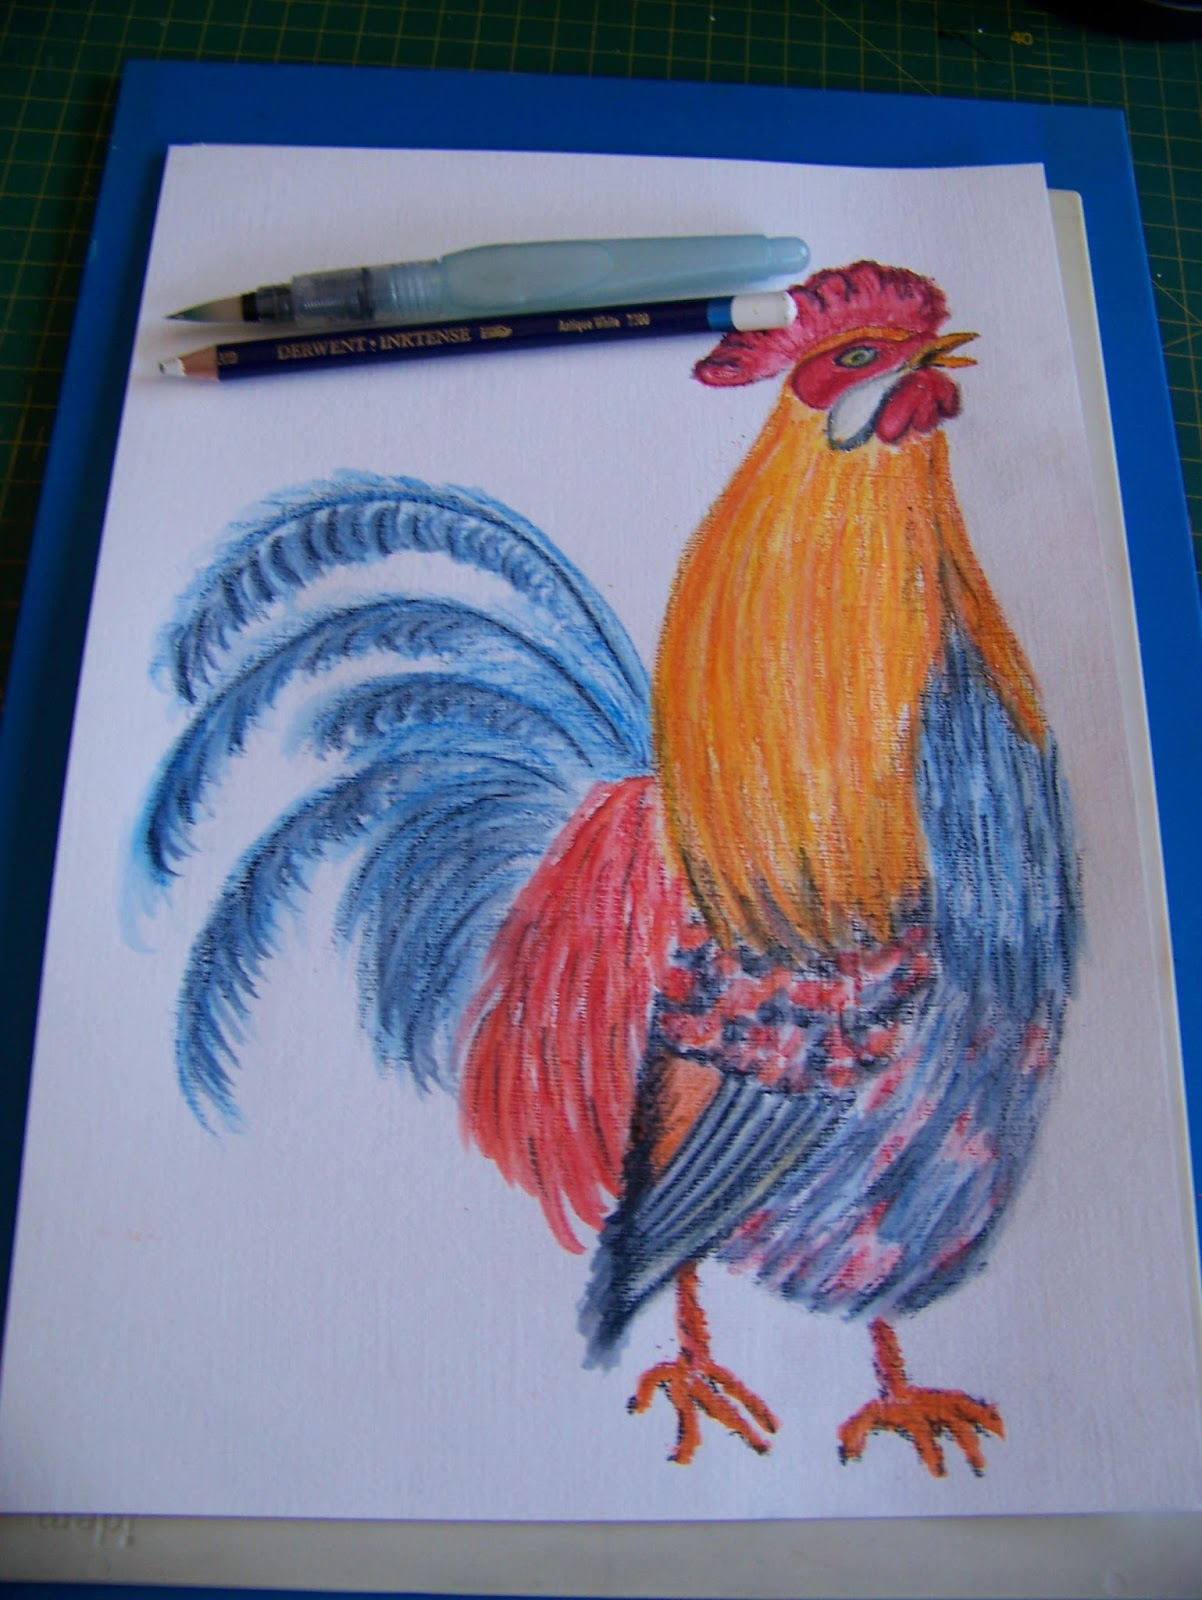
I use only one brush throughout this blog. That is my great favorite, the Pentel Aquash Brush that has a water reservoir in the handle. I paint the water onto the pencil strokes, following the direction of the strokes and making sure I leave white spaces between the strokes so that the painting remains light, instead of becoming heavy and solid-looking in appearance.

I then use Chili Red on the comb, face and feet.

Remember that there is a change in color when the water is applied. Acquaint yourself with this.

For the next step I want to blend two colours and lay them down together. The colors are Tangerine and Sun Yellow.

Can you see that a new colour was created this way? The added benefit is that both of the original colors are still present where they did not mix. This assists me in creating a more believable chicken.

In this step I mix Tangerine and Poppy Red. This mix dominates the back feathers, but seeps into other areas as well.

A close study of the painting will show that I use long strokes of the pencil and brush for most aspects of the chicken to create streaky feathers. Yet there are areas where I do 'smudges' to create more fluffy feathers.

I use Tangerine on the feet.

It is now time to add my darkest dark to the picture. This will help with a lot of the definition. Instead of using the predictable Black, I choose to use Deep Indigo. This color is used in every single part of the chicken, from the comb down to the feet and from the tail feathers through to the breast feathers.

This step is the main reason for my choosing to work with Inktense. When I now paint the Deep Indigo with water, the color does not mix with the other colors that have had a chance to dry. So, instead of getting a muddy mess, I get true depth and definition.

I paint the wing with Deep Indigo and Tangerine, using both a mix and individual colors.

Chinese White is used in the white areas. When painted, the white will do a soft blend on the edges, making the transition from one area to another smoother.
Finally I blend Willow, Bright Blue and Iris Blue in the shadow under the chicken. I write and paint my name in Ink Black.

In a couple of very easy steps I have painted a cocky chicken strutting his stuff in the yard. Why don't you try this yourself and discover the true artist within.

After having drawn and painted the cock, I had a couple of people coming by and when they saw the picture, they said they wanted to do this themselves. Not everyone was enthusiastic about drawing the picture themselves though. So the next day, I sat myself down and drew both a cock and a hen to go into the Digital Downloads collection on APrettyTalent.com under the title Chicken Duo. You can find it there and download the designs to print or project for your own arts and crafts projects. I redrew the hen by hand then to include the steps for painting her as well.

I started with Iris Blue.

The Iris Blue was then painted with water. Note that I did not paint the shadows on the ground.

I used Chili red on the facial areas

I painted the Chili Red..

Next I added Tangerine.

This also was painted.

Then I used one of my personal favorite colours, namely Sherbet Yellow.

This also was painted. Don't you just love how radiant it makes the picture appear?

Now came Violet.

This was painted.

Deep Indigo was once again used for the deep shadow areas.

Never forget to paint. I was now ready to paint the shadow on the ground as well, the only place in this painting where the colors were allowed to mix.

All that was left to do, was to sign and paint my name in Ink Black.

In a flash I had a matching hen for my cock.

This set is available from the Gallery in APrettyTalent.com under Miekie.
For more crafty ideas and great products, visit APrettyTalent.com.
Remember to keep nurturing your TALENT for making PRETTY things.
You can subscribe to this blog and receive regular updates by email by simply registering your email address at the top of the current blog.
No comments:
Post a Comment