Understanding the pattern
Laying out and cutting out the fabric
Sewing a top following the pattern directions
The first thing that attracts you to a pattern is probably the model of the pattern inside. But there is a whole lot more info to be had from this envelope. I use a pattern that a client recently brought me to turn into a top for her.
There are a number of design houses producing patterns and they each have their own pattern books that appear regularly. A good fabric store will have these pattern books available for you to page through. The name of the design house will appear on the pattern book as well as on the pattern. In this case it is McCall's. The pattern book will then provide you with the pattern number for the specific pattern of your choice. In this case it is M7019. You can then ask the stockists if they have the pattern in stock. Alternatively, they should be able to order it for you.
Most patterns come in two size groups. This size group is E5, which is sizes 14-22.
Aside from the photo, you will also find drawings of different variations on the pattern available inside the envelope. The pattern will also be marked with a difficulty level, although some designers do not indicate this.
The back of the envelope has just as much handy information.
It will have technical drawings of the pattern variations with front and back views to clarify the patterns.
Some pattern have fabric suggestions that should be adhered to for best results. In this case it is essential that a stretch fabric be used. There is even an indication of how far the fabric should be able to stretch.
If you lay your fabric on the stretch indicator ...
... and then stretch it out, it should be able to reach the limit set for it (or surpass it).
There is also a guide to tell you how much fabric you should buy for the different sizes the pattern comes in. It gives you the measurements for the fabric as well as its contrasts. Study this carefully to avoid overspending. Take note of the width the fabric comes in. The pattern will indicate measurements for different widths as well.
Often, the English will be measured in yards. Simply let your eyes rove over to the French (or other languages) and you will find the metric measurements lined up with the American ones.
The flap of the envelope also has info to take note of. It will tell you the body measurements for the different sizes the pattern comes in. This way, you can take your measurements and immediately know which size you should cut your pattern out on.
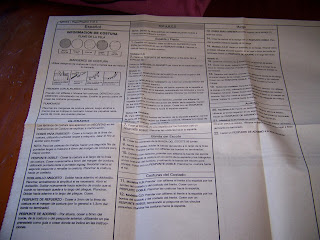
Inside the envelope you will find the trace paper that the pattern is printed on. You will also find newsprint paper that has more instructions and useful information.
There is a repeat of the technical drawings.
The pattern pieces have their own technical drawings with numbers that correlated to numbers found on the actual pattern pieces. There will also be a list to indicate which numbers you will need for the different variations.
The markings printed on the pattern is explained.
It is explained how to, and where to, adjust the patterns to accommodate people who are not equally tall.
This is followed by some information for cutting and marking the fabric.
Various cutting layouts are given for the different variations of the pattern with its contrasting fabrics. Make sure you follow the guidelines for the correct option.
A close up of the layout options follow. This is for Top A and variation Top B.
The contrasts for Top B are given. Top C's layout is given.
The contrast for Top C and the layout for Top D can be seen here.
You also have the contrast for Top D.
When reading the instructions for sewing the pattern, you will see pictures to guide you through it. These pictures will have different fabric finishes and these are explained in this key. You are also provided with useful information on what is meant by sewing terminology commonly used in patterns.
The Glossary has more explanations of terms.
This is finally followed by the actual sewing directions. I'll walk you through making sense of this in a follow-up blog where I will show you step by step how to make this top from the pattern directions.
Most patterns also have translated instructions in a range of languages. You may want to search for your home language further down the pattern.
It is now finally time to unfold the pattern sheets. The pattern will come printed out over a couple of sheets with a number of pattern pieces to a sheet.
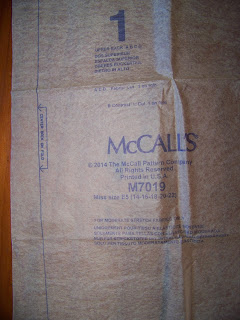
Each pattern piece will have a number corresponding to the one indicated on the instruction sheets. It also tells you what the pattern piece is. In this case it is the back peplum (large frill) for pattern variations C and D. It has the pattern number, corresponding to the one on the envelope. It tells you how many of the pattern pieces should be cut and which fabrics it should be cut from.
You will often see advice for preparing your pattern printed somewhere in the pattern pieces, or on the pattern sheets.
Once you have taken your measurements, you will know which line you should follow for cutting out the pattern. Each of these lines represent a different size.
Some pieces need to be cut on a fold. Look out for these.
You will also find these translation glossaries, which you will probably ignore, just like me.
Here you can clearly see the corresponding numbers.
You can now start cutting out the pattern on the determined lines.
It may be good advice to cut out your notches like this. It will make it easier to line the fabric pieces up in the sewing process. I'll get back to this later.
Marietjie Uys (Miekie) is a published author. You can buy her books here: You can purchase Designs By Miekie 1 here.
Jy kan Kom Ons Teken en Verf Tuinstories hier koop.Jy kan Kom Ons Kleur Tuinstories In hier koop.
Jy kan Tuinstories hier koop.
For more crafty ideas and great products, visit A Pretty Talent on Facebook.
Remember to keep nurturing your TALENT for making PRETTY things.
You can subscribe to this blog and receive regular updates by email by simply registering your email address at the top of the current blog.


No comments:
Post a Comment