
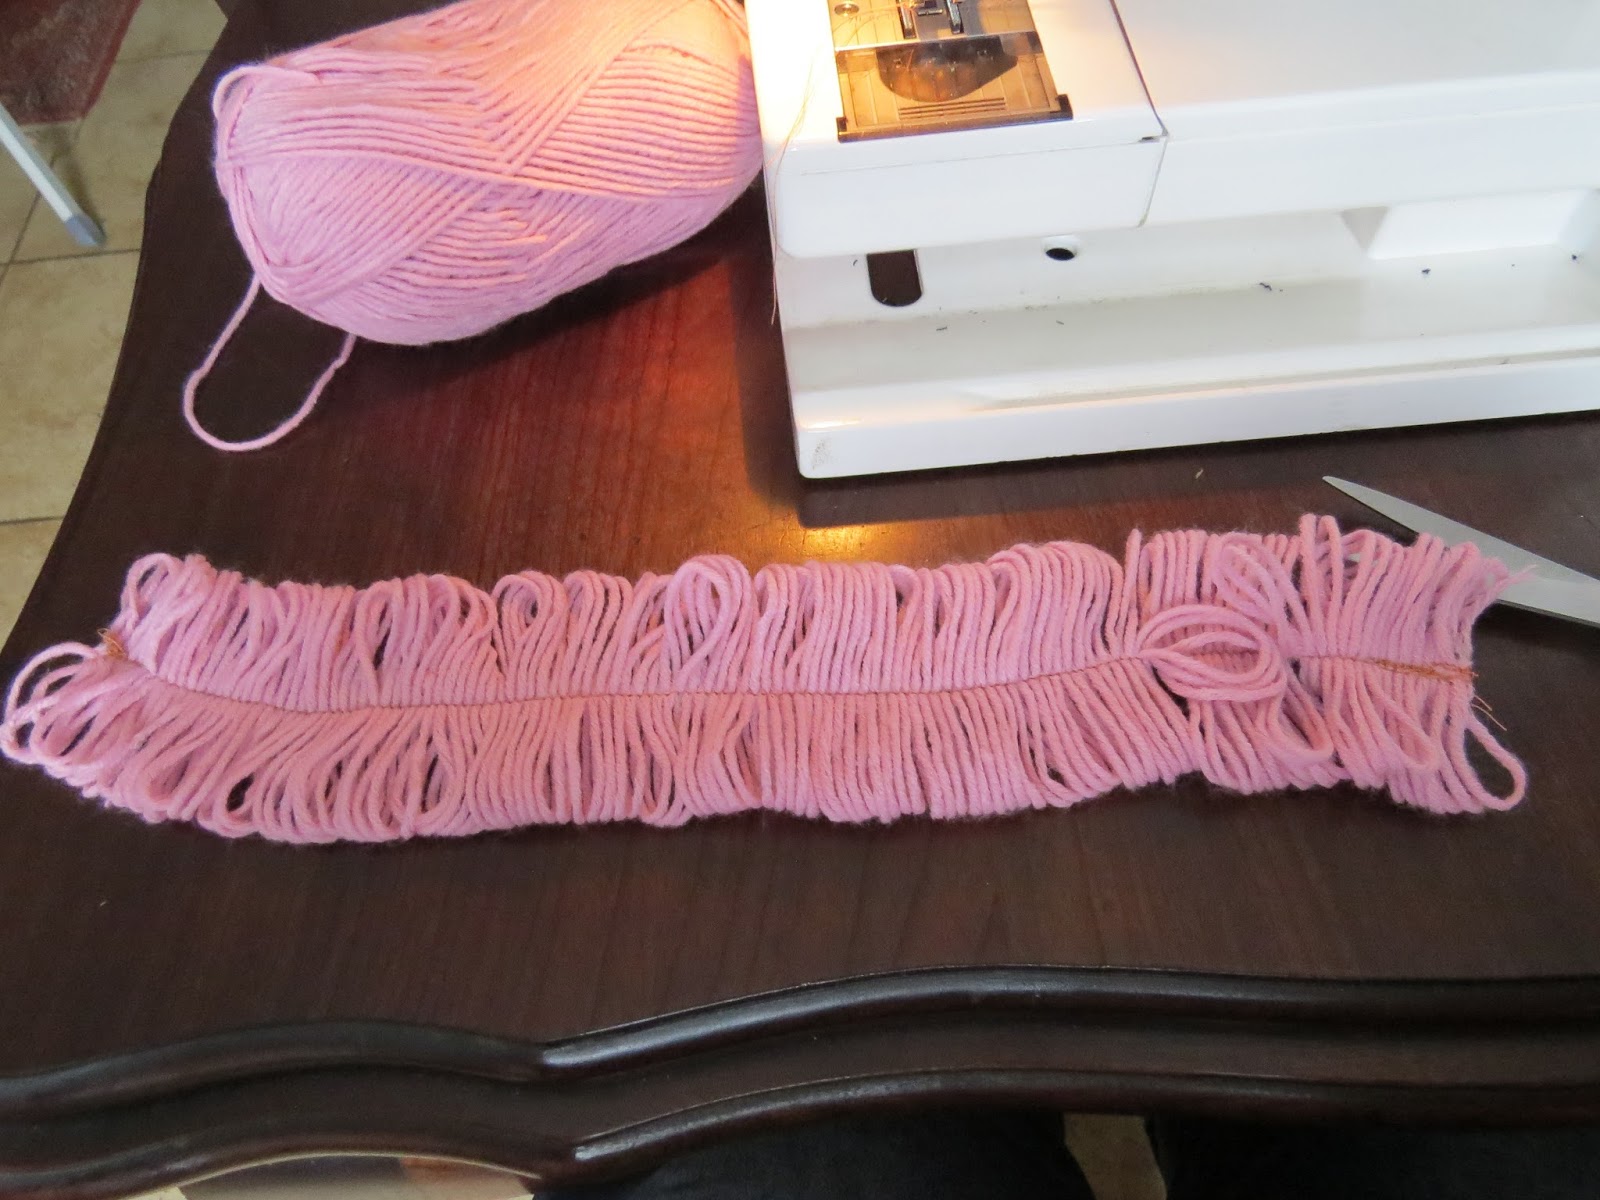
You will need some wool and a cardboard that you have cut to look like mine with a gap in the center.

Wind your wool around the cardboard, making sure to wrap it through the gap, almost in an s-shape.

Continue until the whole cardboard has been wrapped. Do not overlap the wool.

Sew down the gap in the cardboard, making sure not to sew into the cardboard.

Pull the cardboard out and you are left with perfect curls for your doll.
Sew the hair to the head by hand.

I used four lengths of curls to cover the head on my doll.

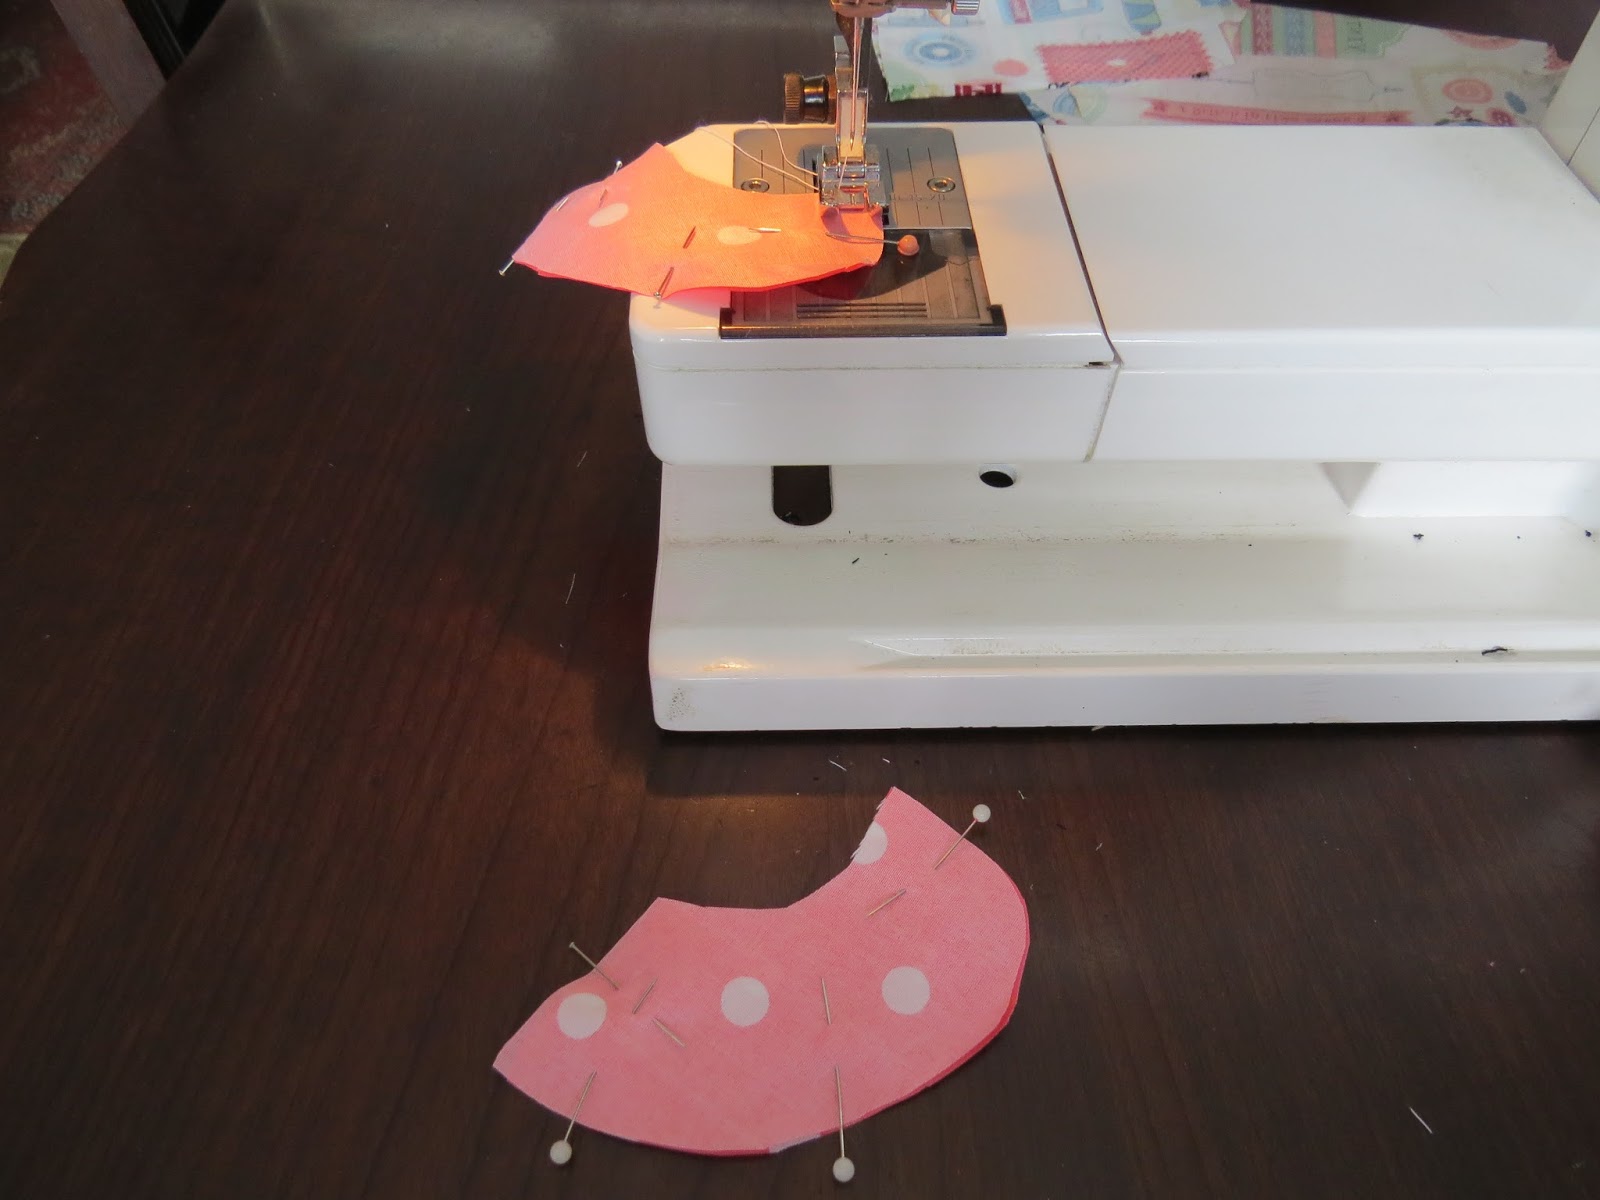
It is time to start constructing the clothes now. I start by folding the pockets in half on itself. Sew all along the edge of the pocket, leaving a small gap open to turn the pocket out.

Cut notches in the pocket seam and turn it right side out. Fold the edge of the gap in and pin.

I found a tiny piece of leftover lace, just long enough to fit the two pockets. I pinned it to the tops of the pockets and sewed it on.

I then pinned the front and back crotch of the pants and sewed these.

I laid the collar pieces on each other with right sides facing and sewed all along the edge, except where the collar is attached to the neck line.
Cut notches in the seam of the collar.

Turn the collar right side out.

Fold the back bodice in half and cut open at center back.

Pin the front and back bodice at the shoulders and sew.

I now ironed all of the pieces flat that I had been working on. At the same time, I also folded both sides of center back in and ironed it flat.

I pinned the inner legs of the pants.

I then sewed the inner legs of the pants, starting at one hem, sewing through the crotch and ending at the other hem.

I hemmed both legs of the pants as well as folding the waist over.

Leaving each of these hems a small gap to insert elastic, I sewed the three hems on the pants.

I measured the length of the elastic to fit the legs. I cut two pieces of elastic for the legs.

I also measured a length of elastic to fit the waist of the doll.

I used a bodkin to pull the elastic through the hems on the pants.

I then sewed the two ends of the elastic pieces together.

I was now ready to dress my doll in her newly-made pants.

Next, I secured the folds in center back by sewing them.

I then pinned the pockets to the front of the dress.

I sewed all around the pockets to attach them to the dress, leaving only the tops of the pockets open.

I then pinned the collar to the neckline of the dress. Note how the collar meets at center front and lines up with center back.

I sewed the collar onto the dress in one single stitch line.

I then ironed the collar open.

I pinned the seam of the collar to the dress.

I then sewed the seam to the dress, making sure it would not pop out during play.

I could now finally iron the collar flat.

I pinned the sleeves to the armholes.

I sewed the sleeves onto the dress.

I then pinned the sleeve seams and the side seams.

I sewed the sleeve seams and side seams.

I pinned the hems on the sleeves.

I sewed these hems by hand as the space was too tight to machine sew with ease.

I then pinned the bottom hem of the dress.

I sewed the bottom hem of the dress.

I dropped the feeder of my machine and set my machine to sew zigzag. I then set the width of the zigzag to match the holes on my buttons and machine-sewed the buttons onto the dress.

I sewed three buttons onto the center back of the dress.

I measured loops from ribbon to make looped buttonholes.

Bring the two ends of the ribbon together as shown.

Fold the ends of the ribbon in.

Pin the to the dress at center back.

Double check to make sure the loops line up with the buttons.

Sew the loops onto the dress.

The dress is finished and it is time to put it on the doll. I had just put her on the bed to take the final photos when my niece returned from school.

She simply assumed the doll was hers, grabbed her up in her arms and delightedly named her after herself! I guess the doll is hers, then. I can hardly imagine anyone else deriving more pleasure from a scrap fabric doll!

Marietjie Uys (Miekie) is a published author. You can buy the books here:
You can purchase Designs By Miekie 1 here.
Jy kan Kom Ons Teken en Verf Tuinstories hier koop.You can purchase Designs By Miekie 1 here.
Jy kan Kom Ons Kleur Tuinstories In hier koop.
Jy kan Tuinstories hier koop.
You can follow Miekie's daily Bible Study blog, Bybel Legkaart, here in English & Afrikaans.
For more crafty ideas and great products, visit A Pretty Talent on Facebook.
Remember to keep nurturing your TALENT for making PRETTY things.
You can subscribe to this blog and receive regular updates by email by simply registering your email address at the top of the current blog.
No comments:
Post a Comment